any luck with that 9070 hack? if so mind sharing your technique?
Triathlon Forum
Login required to started new threads
Login required to post replies
Re: The official Cervelo P5 thread [veryoriginal]
[ In reply to ]
Re: The official Cervelo P5 thread [drgwood]
[ In reply to ]
P5 - Di2 9070 Brake Shifter Hack
There are plenty of posts covering the original Di2 7970 P5 brake shifter hack. I originally built my P5 up this way and things were working great. Just the other day I finally got the last of my Di2 9070 parts in. Here is how I installed everything. If you have any questions let me know!!
Key Parts needed:
Key Tools needed:
Process:
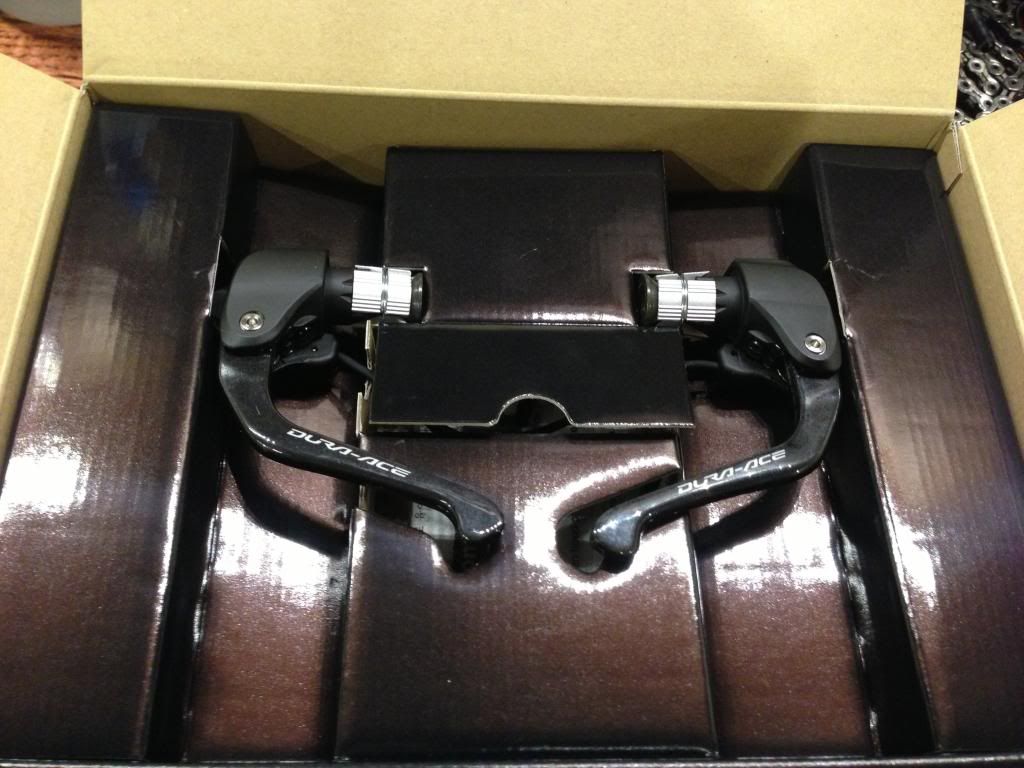
Unboxing the ST-9071 Levers:
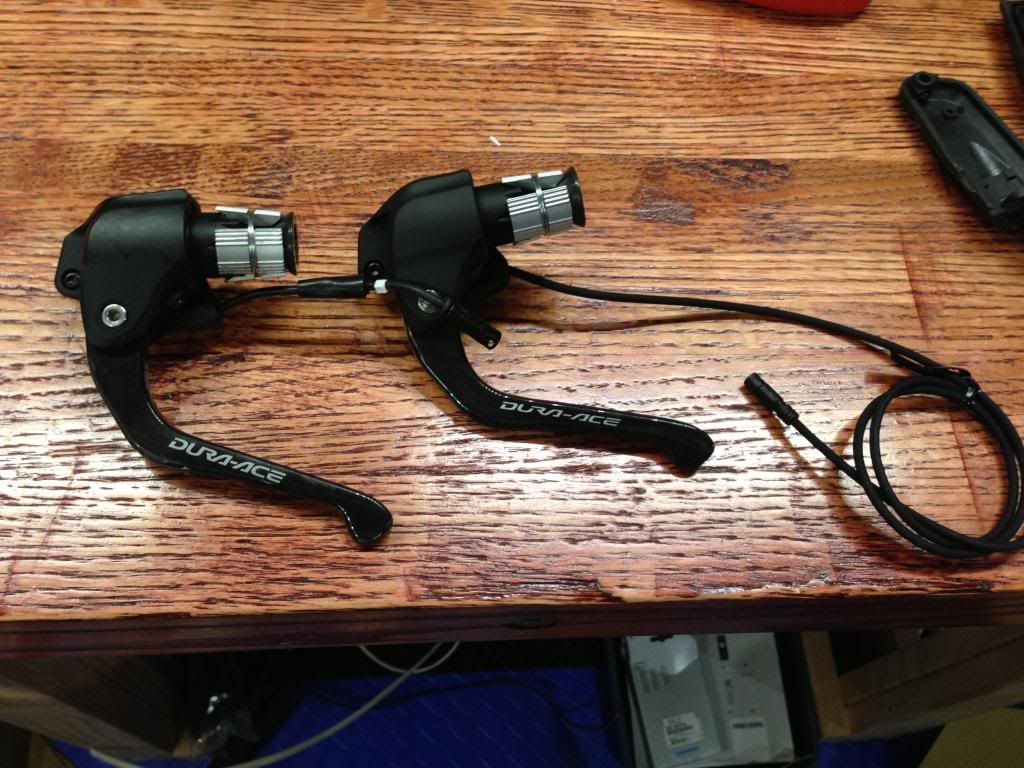
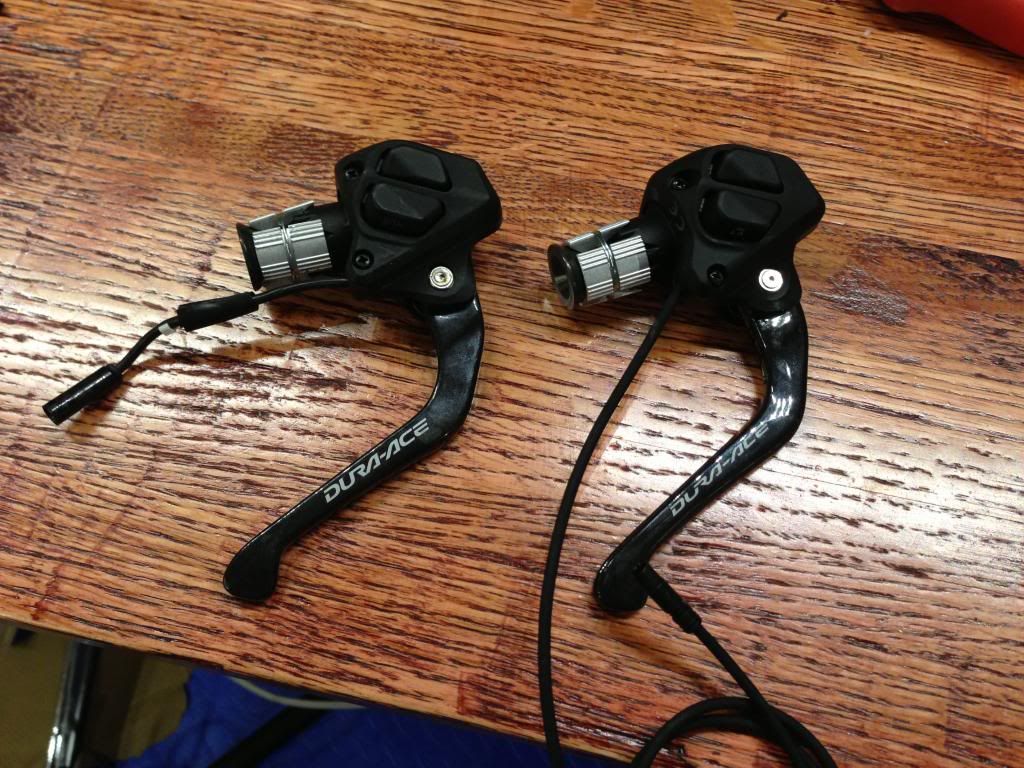
Old 7970 vs new 9070 - These are the exact same brake lever, just with a different electronic switch attachment
Begin Disassembly:
Remove the two black phillips screws:
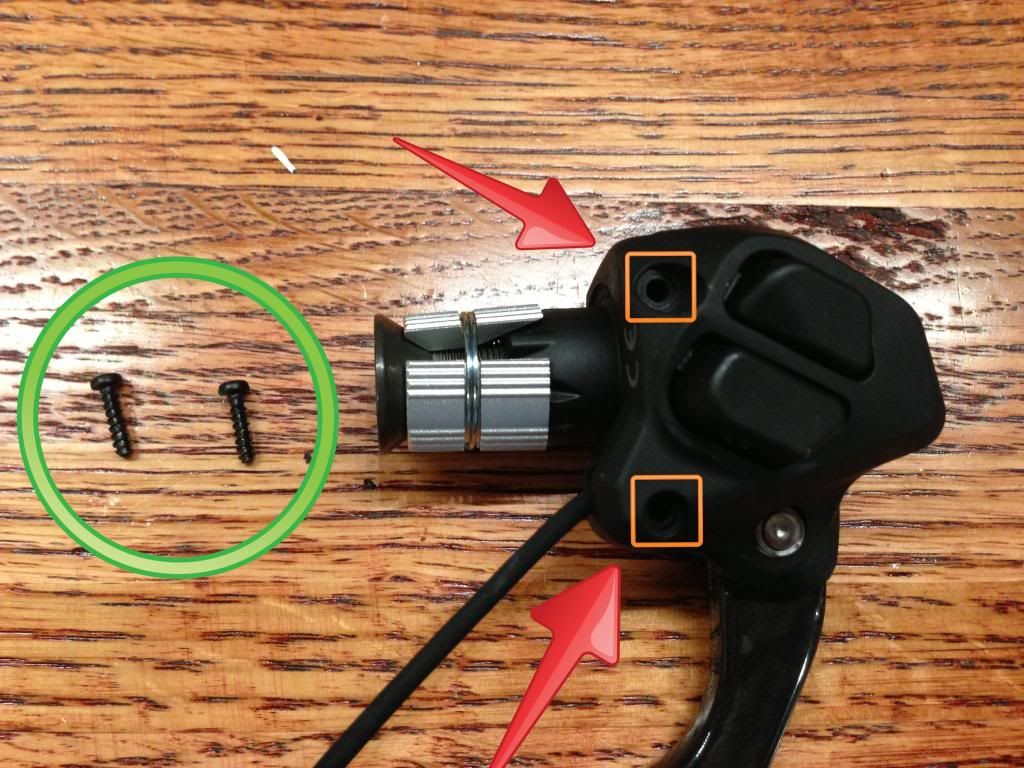
Flip the lever over and remove the #10 Torx Screw:
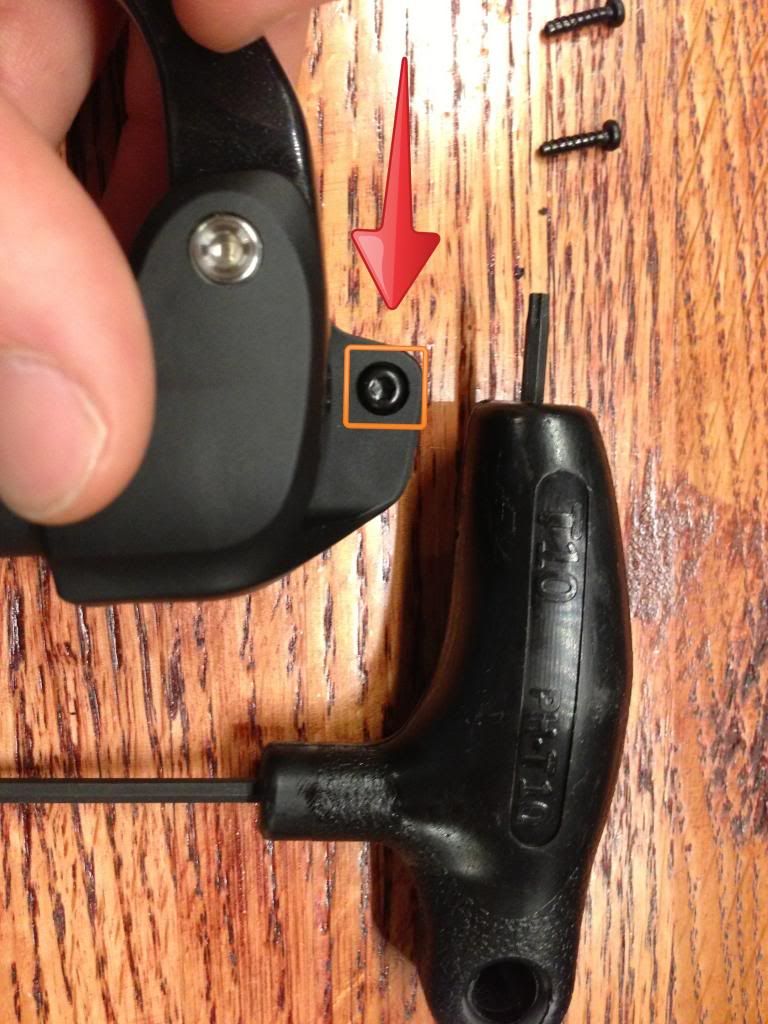
The Button cover will pop open like this:
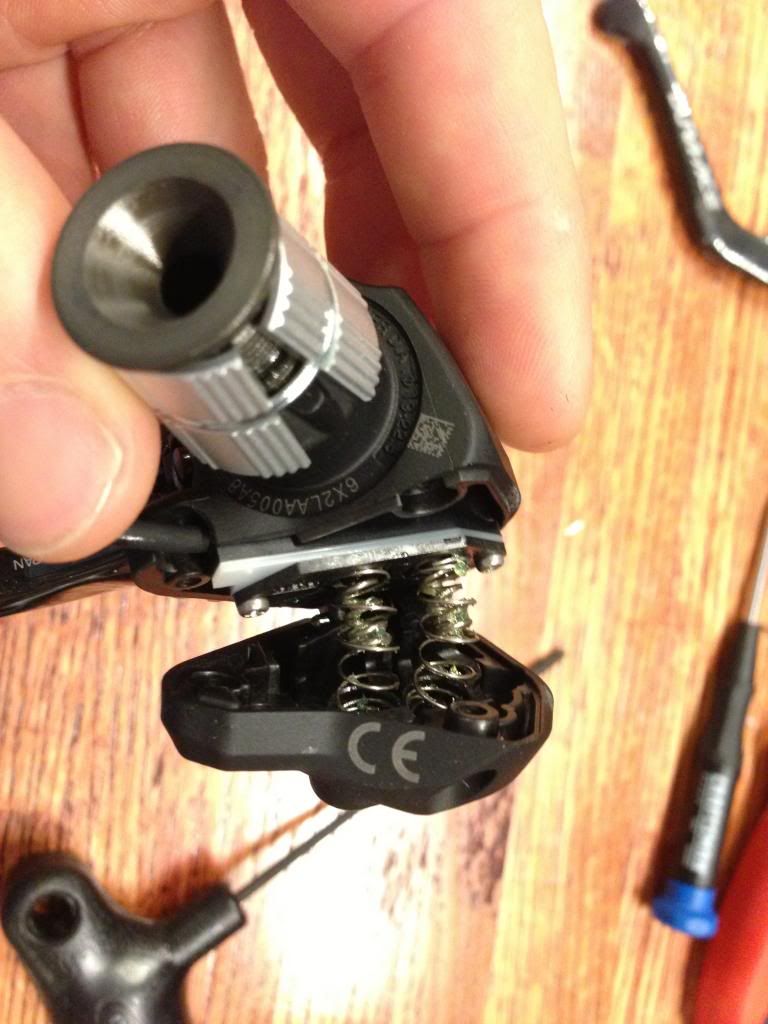
Remove the outer cover and large springs:

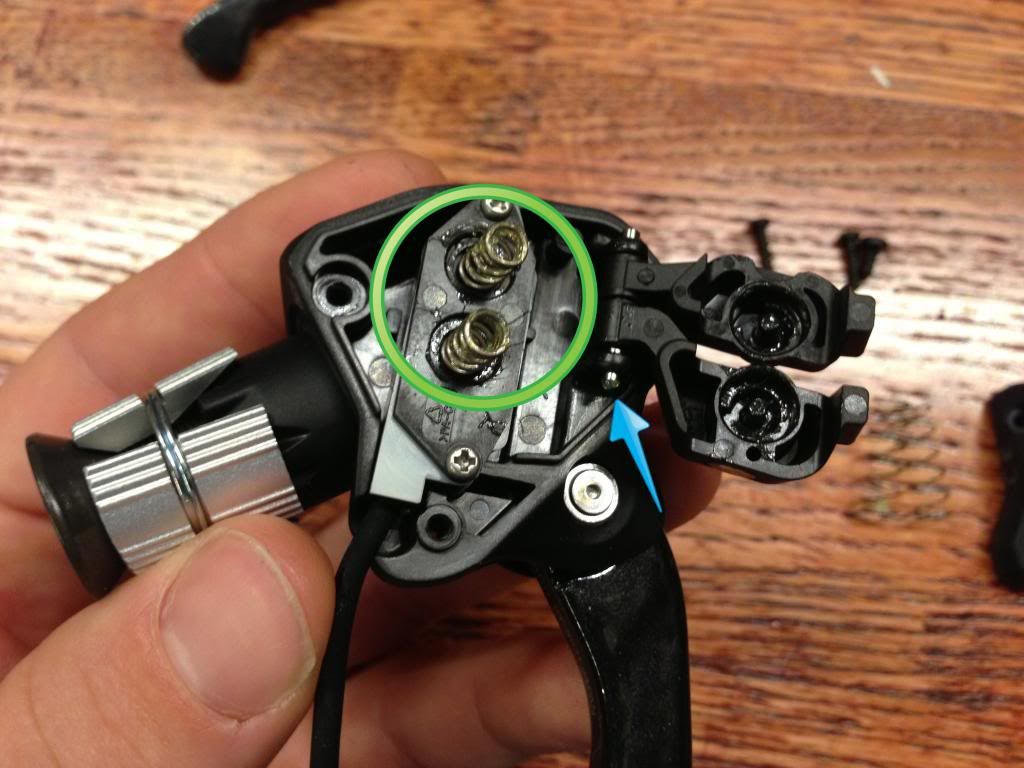
Remove the inner springs (green circle), they have a plastic piece inside the spring that holds it to the inner button, so just give them a tug to separate the two.
Also, slide the silver rod (blue arrow) out and the outer button covers will come off.
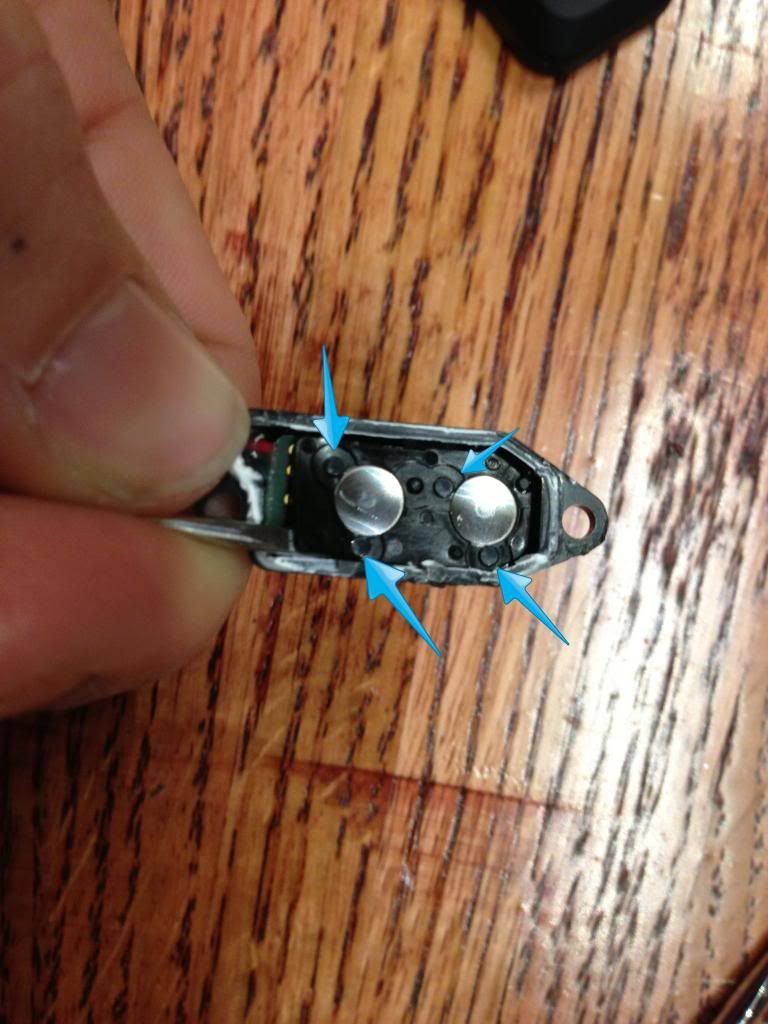
Remove the two silver phillips screws and take off the electronic shifting buttons:
The black piece on the left will come right off, the white piece on the right is what you will work with.
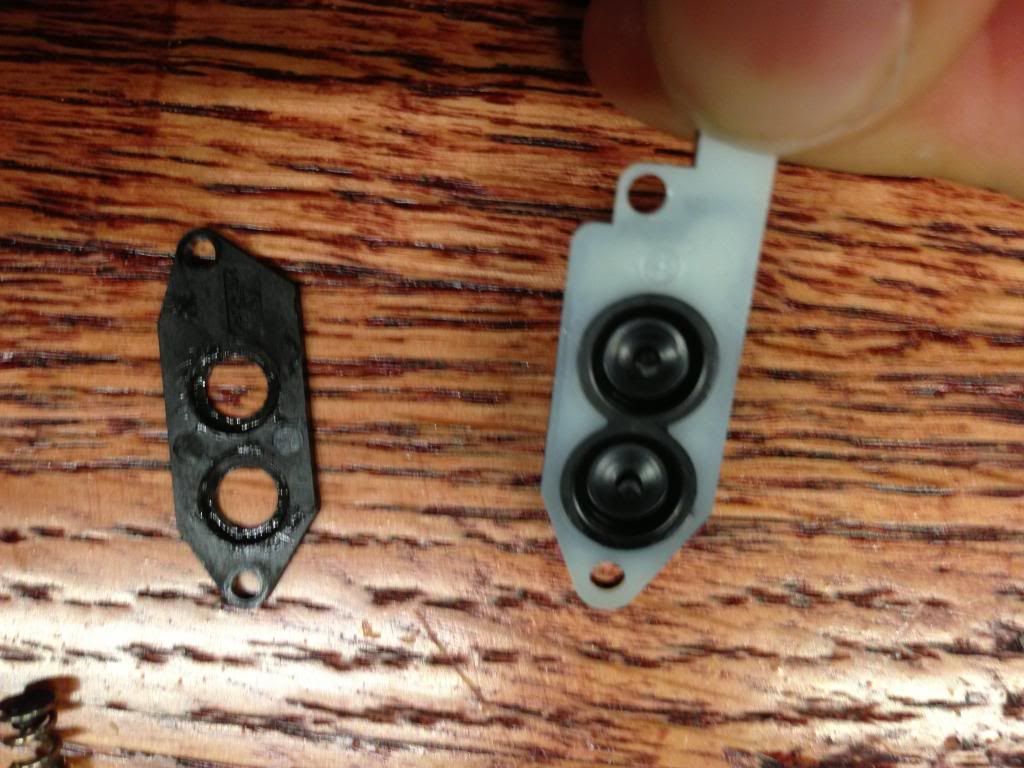
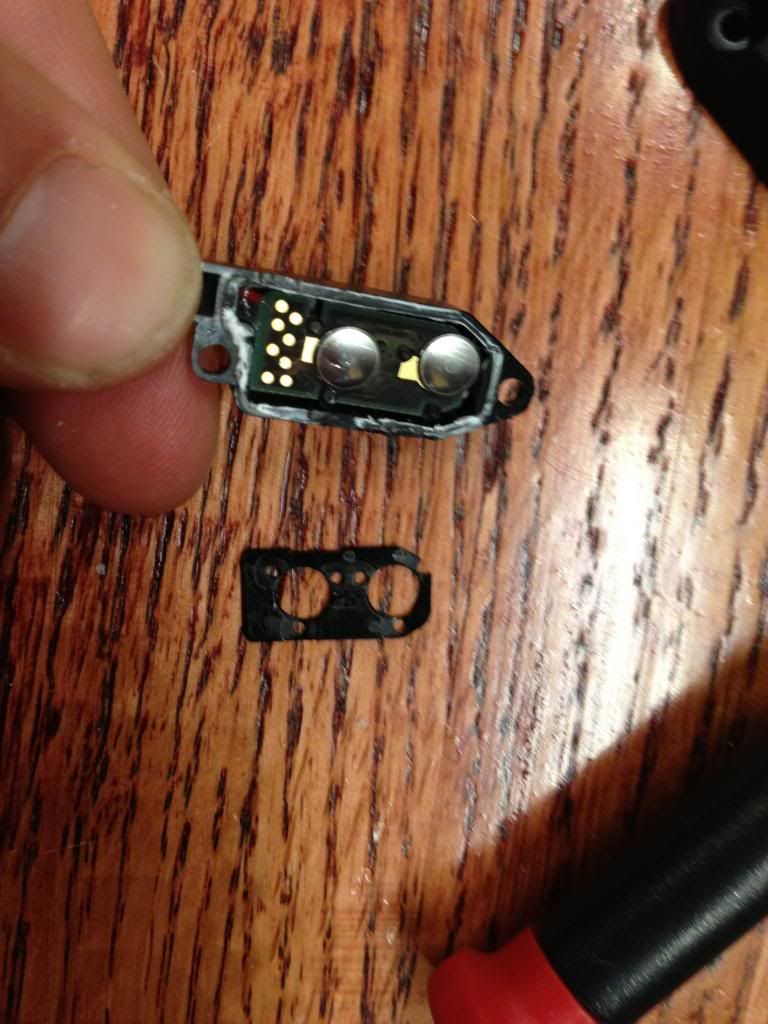
Carefully pry the white piece off of the device. It is glued on there. I used a utility knife to do this. You really won't hurt anything if you break the white piece while doing this, but it makes it cleaner if you can get the whole thing off the button system.
After it comes off:
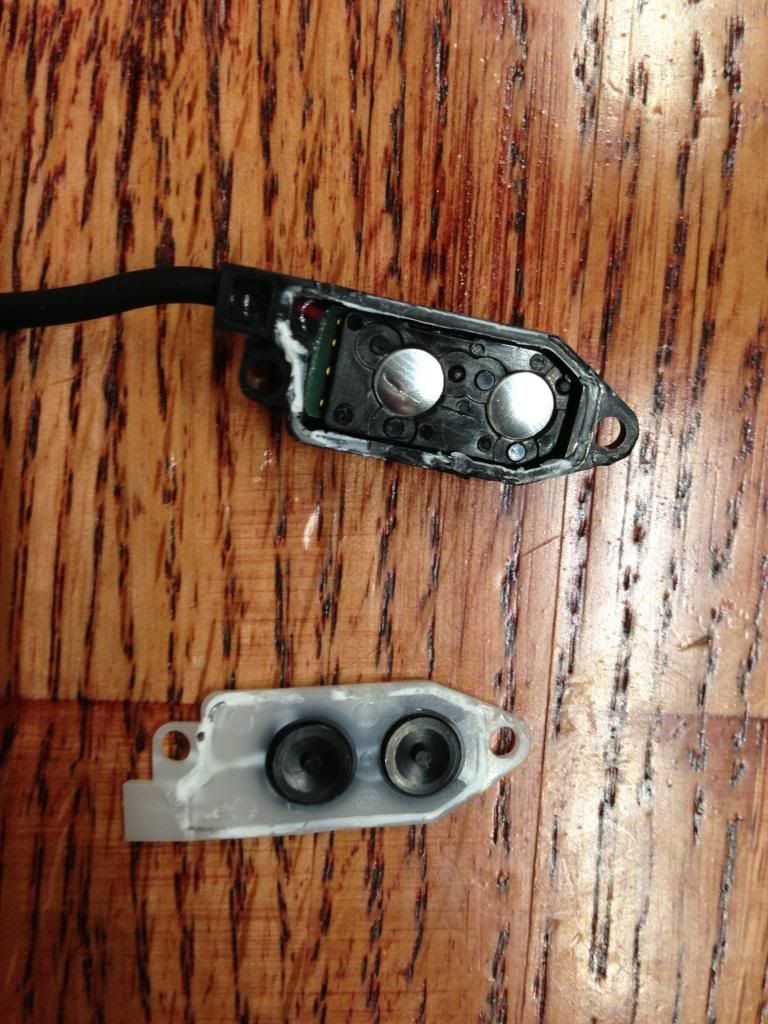
Next use a small flat screw driver to separate the plastic piece of black plastic off the circuit board. It is held on by the four posts that the blue arrows point at. This piece is worthless and might break, but don't worry about it. Just be careful of the circuit board underneath.
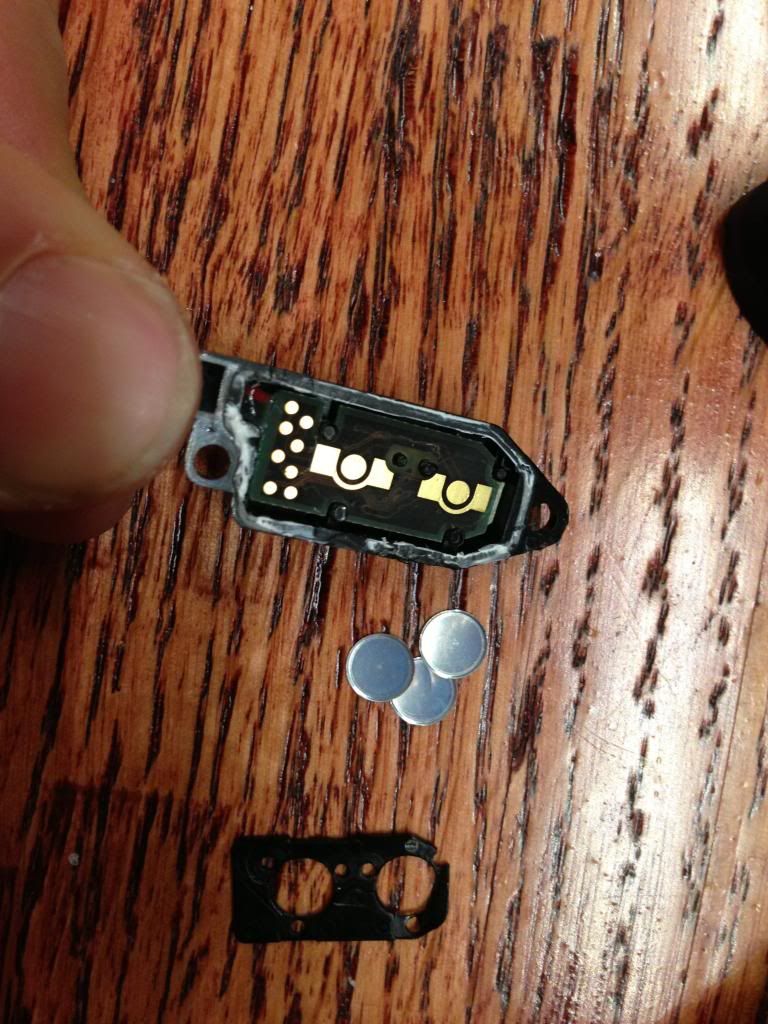
Next, dump the little silver buttons off the circuit board, they were held there by the black piece you just removed, so they will fall right off.
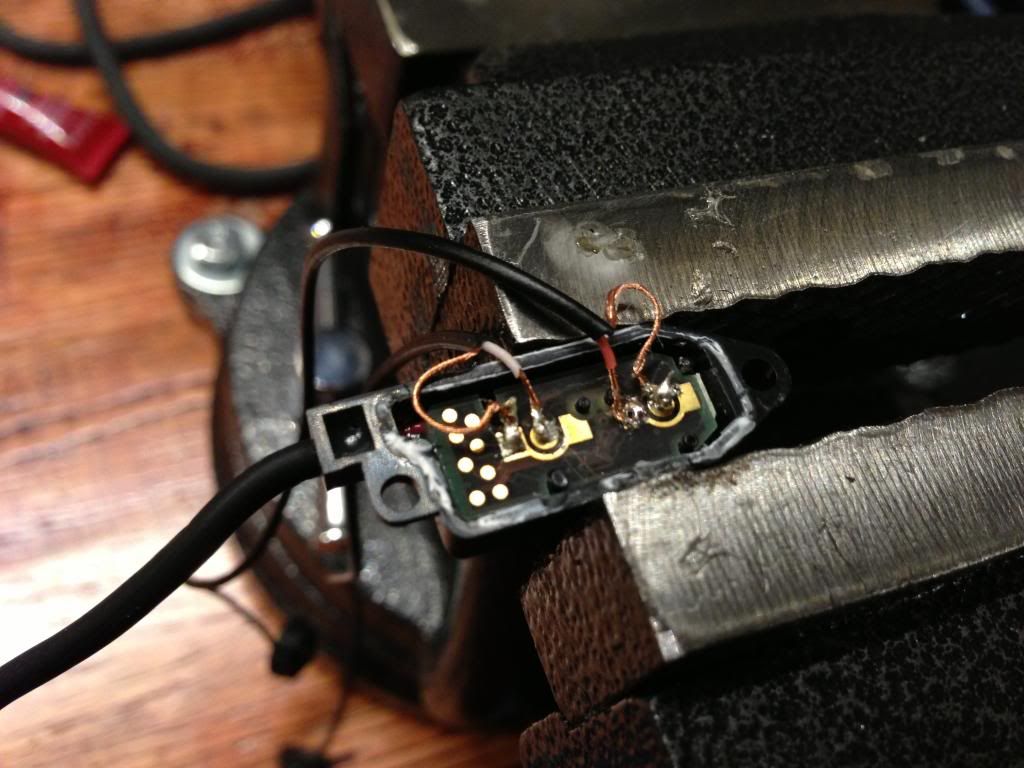
Note the contacts that the red arrows point to, these are what you will be soldering your button to.
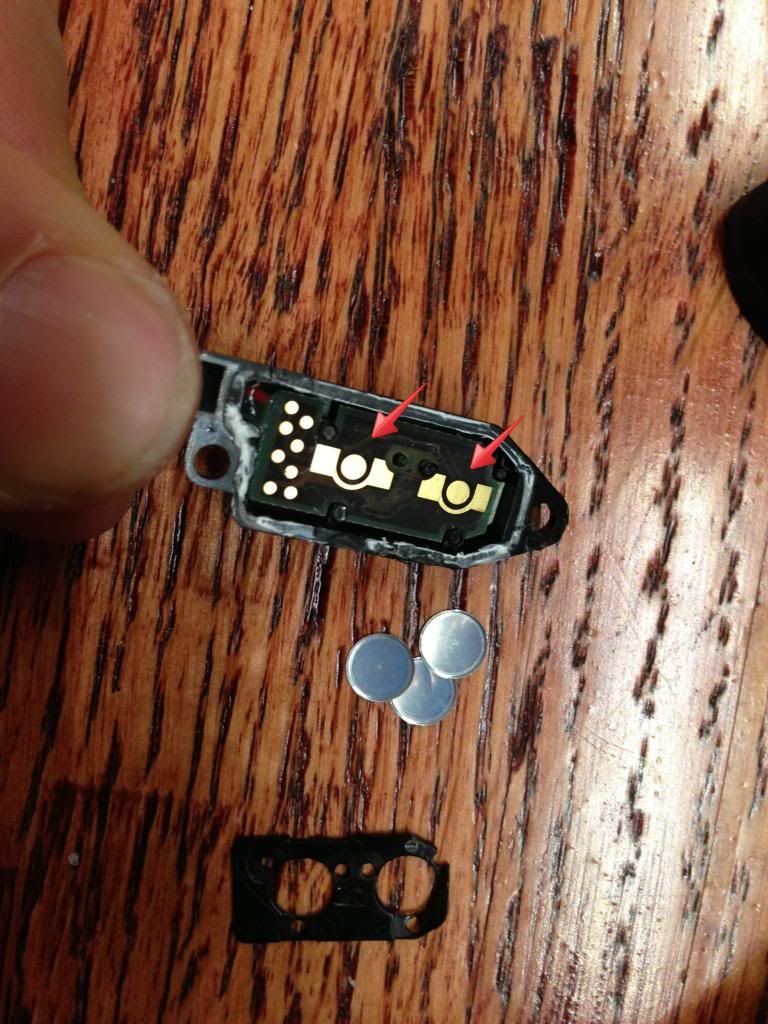
After the fact, I realized that I forgot to include photos of stripping to the wires of the buttons, but it is pretty simple. I cut of the connector, peeled apart the wires, and used my teeth to strip the wire. Here is the post solder photo. One button per contact.
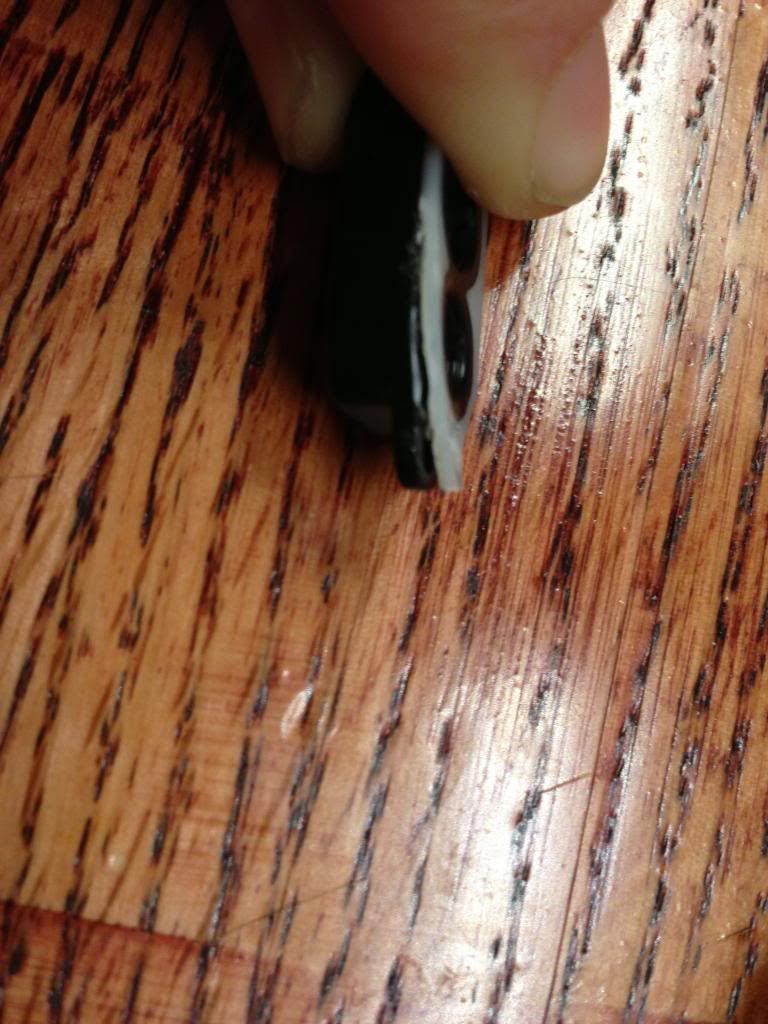
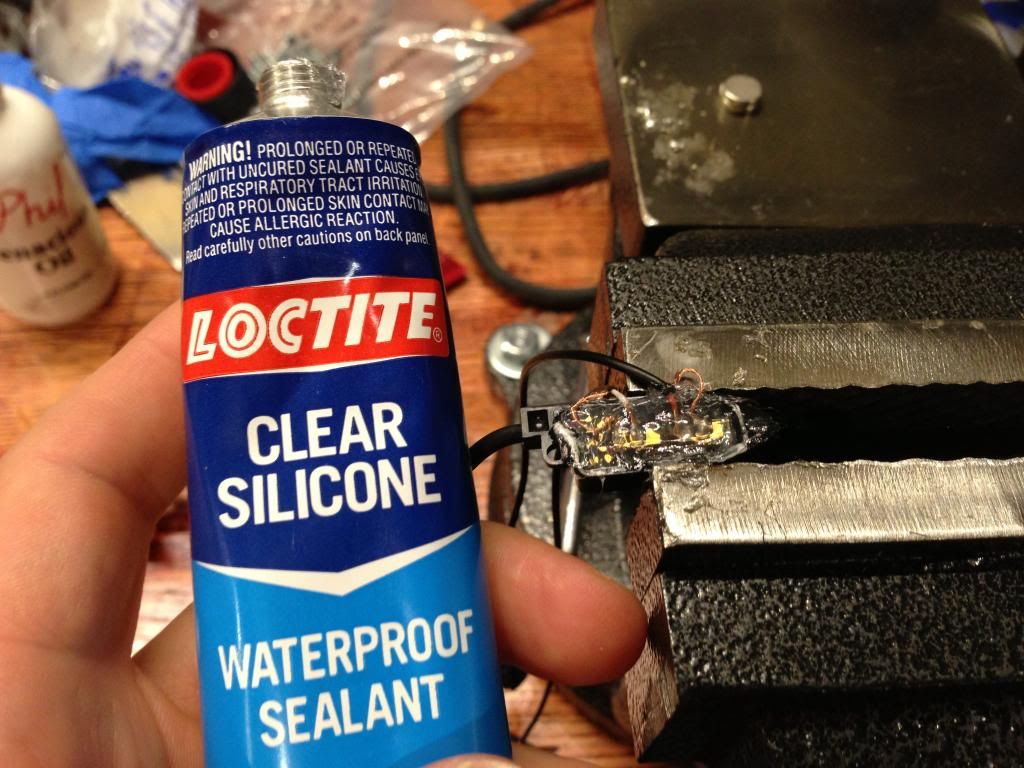
Weather sealed:
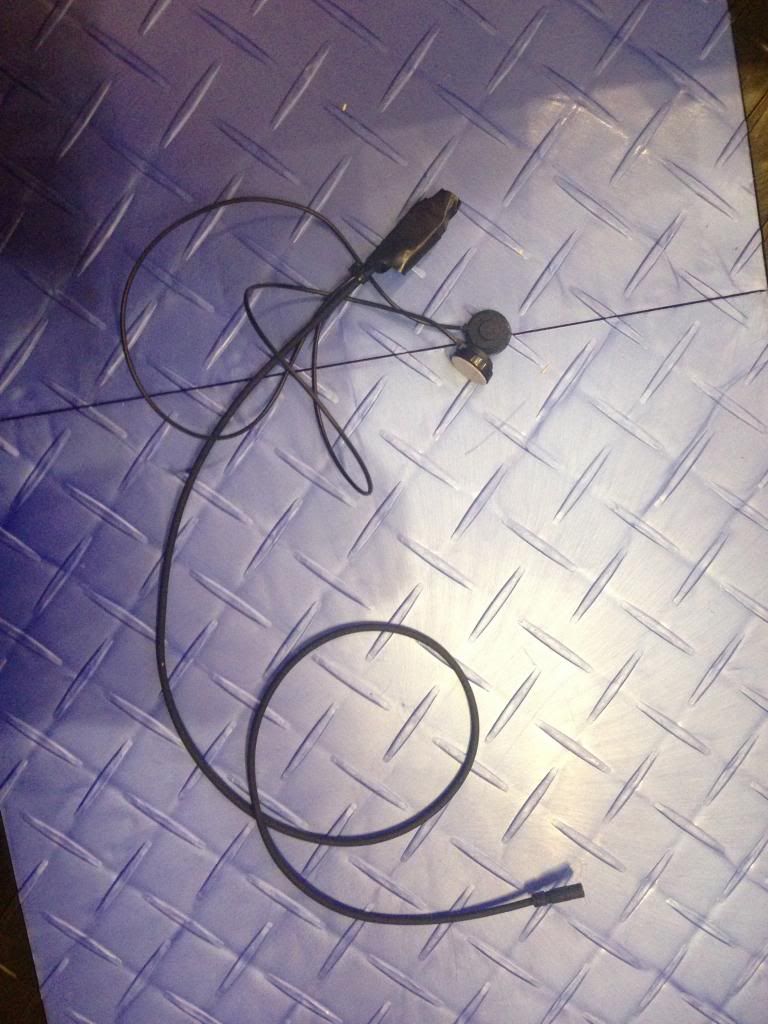
Wrapped in Electrical tape to keep it safe.
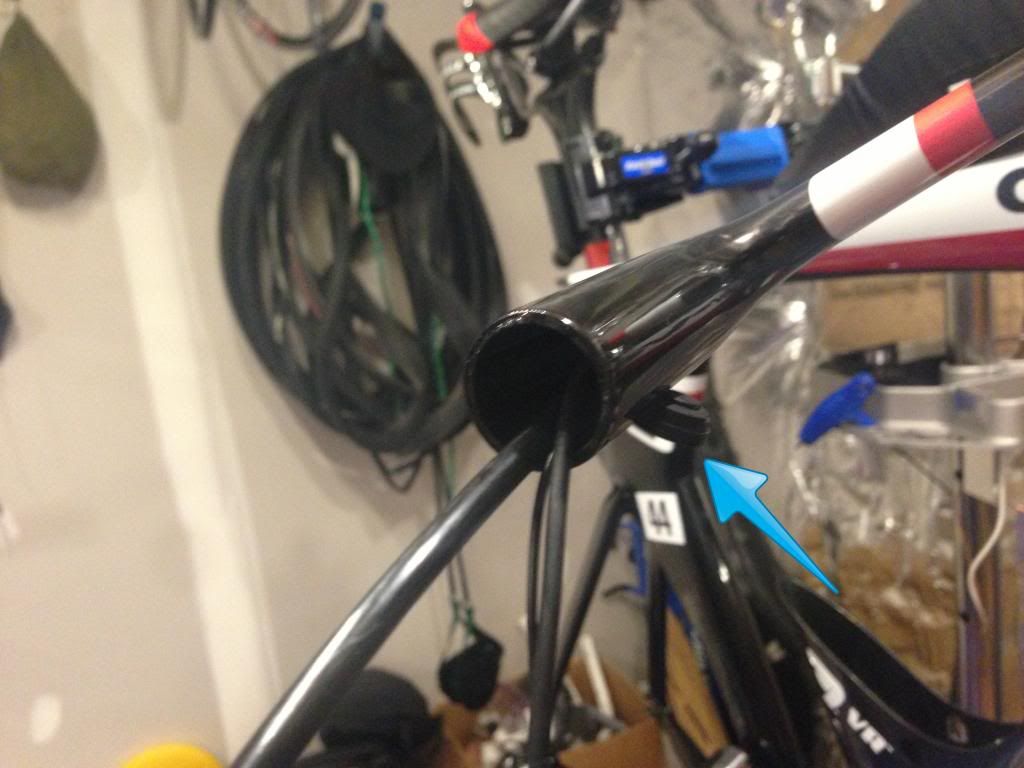
I hate how hard it is to route the cables through the drop bar, but today it went pretty smooth. I pulled out the brake lever.
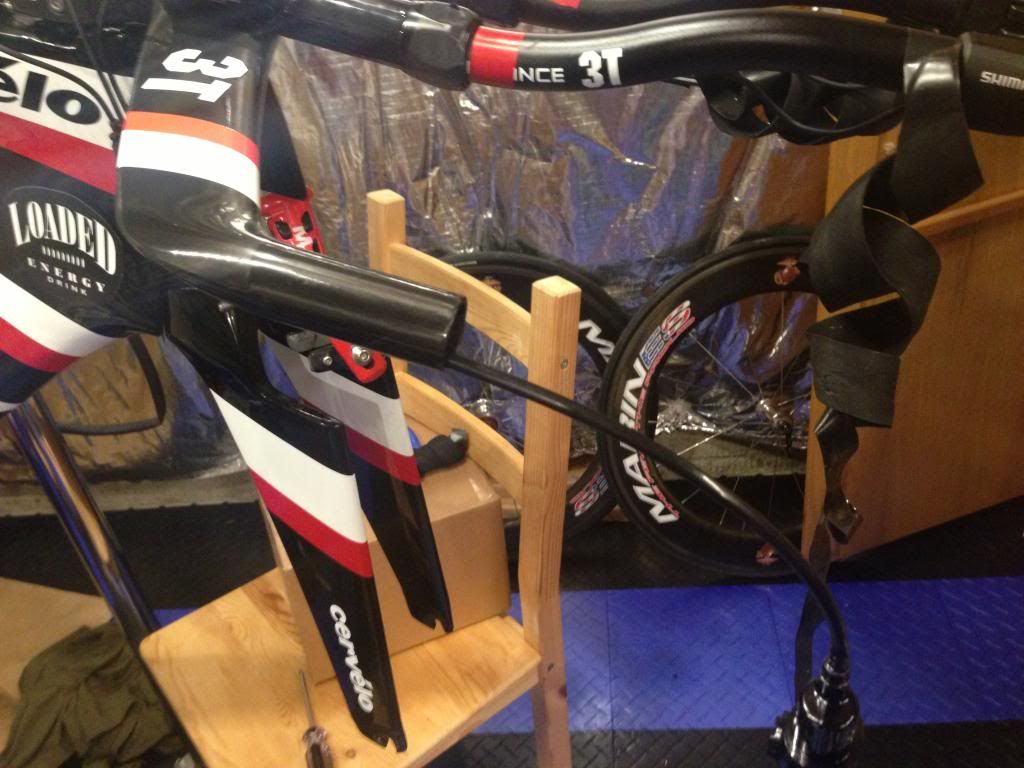
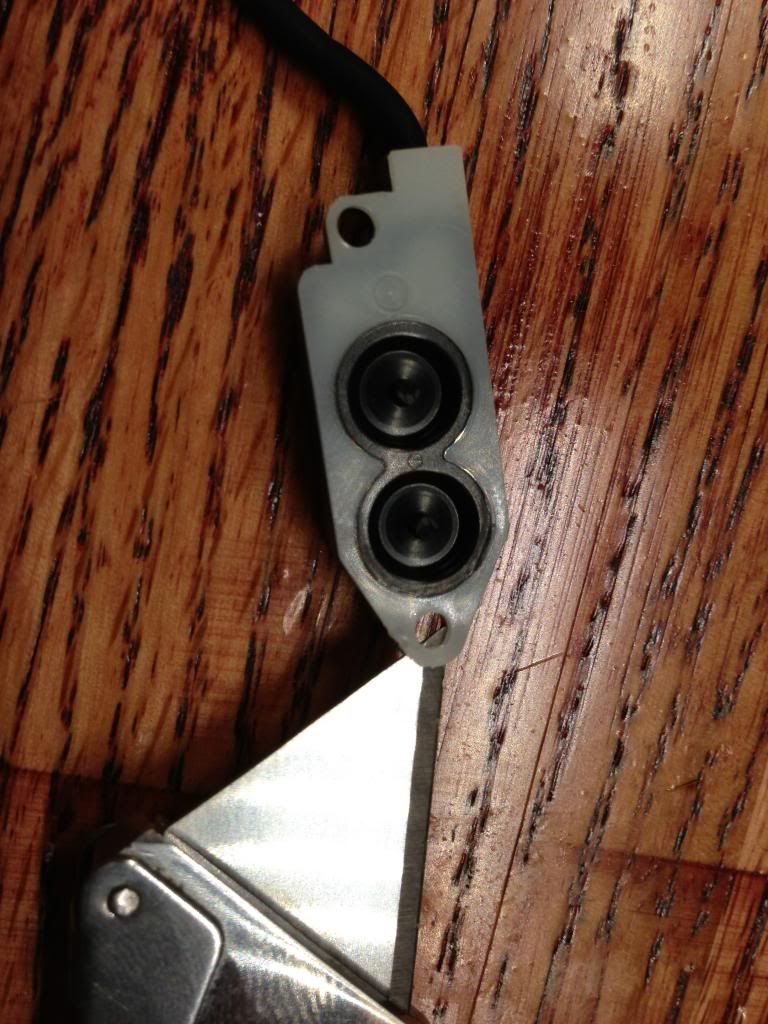
Fished the wire through:

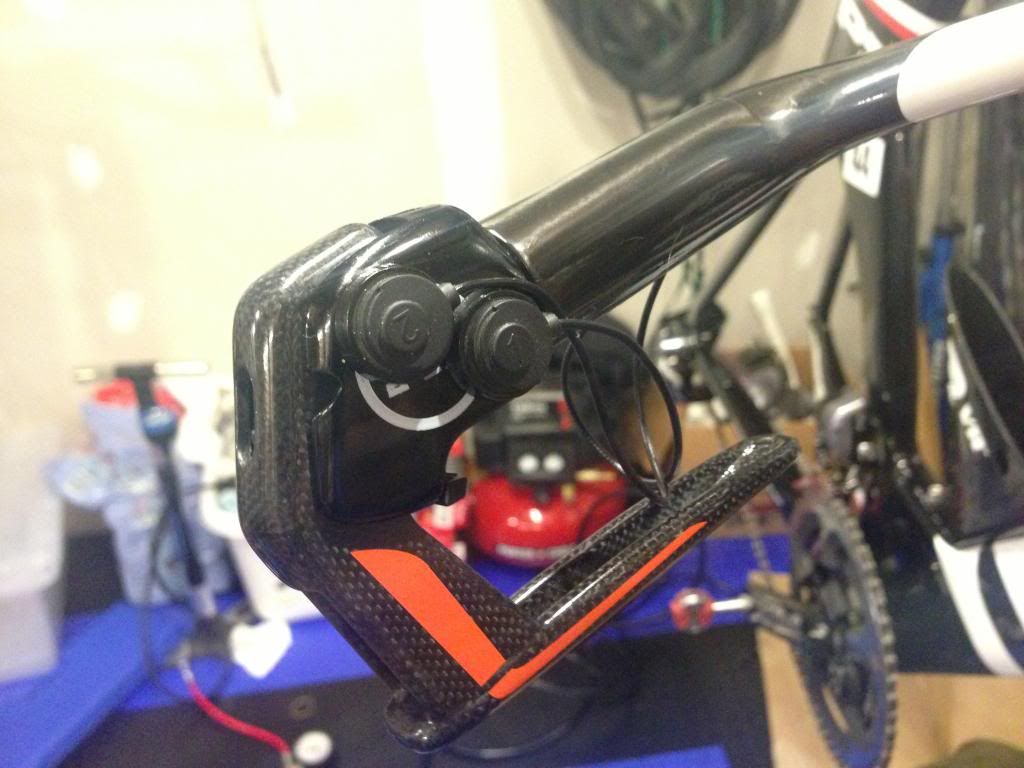
Removed the back from the button, and slid it through the cable hole.
Buttons attached!!
There are plenty of posts covering the original Di2 7970 P5 brake shifter hack. I originally built my P5 up this way and things were working great. Just the other day I finally got the last of my Di2 9070 parts in. Here is how I installed everything. If you have any questions let me know!!
Key Parts needed:
- Di2 E-tube components (FD/RD etc)
- 5 Port Junction A Box
- ST-9071 Brake/Shifters (Dura Ace)
- 2 x Cateye Remote Button Kits - http://www.performancebike.com/bikes/Product_10052_10551_1063043_-1_400128__400128
- Zip Ties
- Silicone Filler (I used loctite)
Key Tools needed:
- Metric Allen Wrenches
- Small Phillips Screw Driver
- T10 Torx Wrench
- 8mm Wrench
- Soldering Iron/Solder
- Vice or small parts holder to hold the parts while soldering
- Favorite wire/tool to fish cables
Process:
Unboxing the ST-9071 Levers:
Old 7970 vs new 9070 - These are the exact same brake lever, just with a different electronic switch attachment
Begin Disassembly:
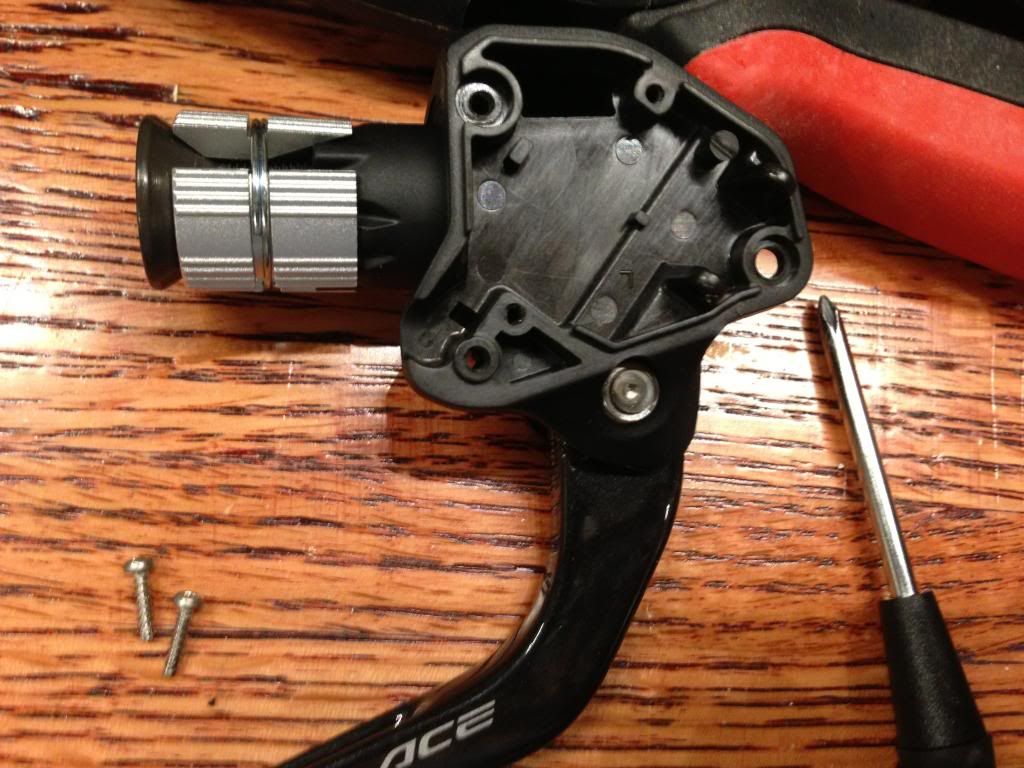
Remove the two black phillips screws:
Flip the lever over and remove the #10 Torx Screw:
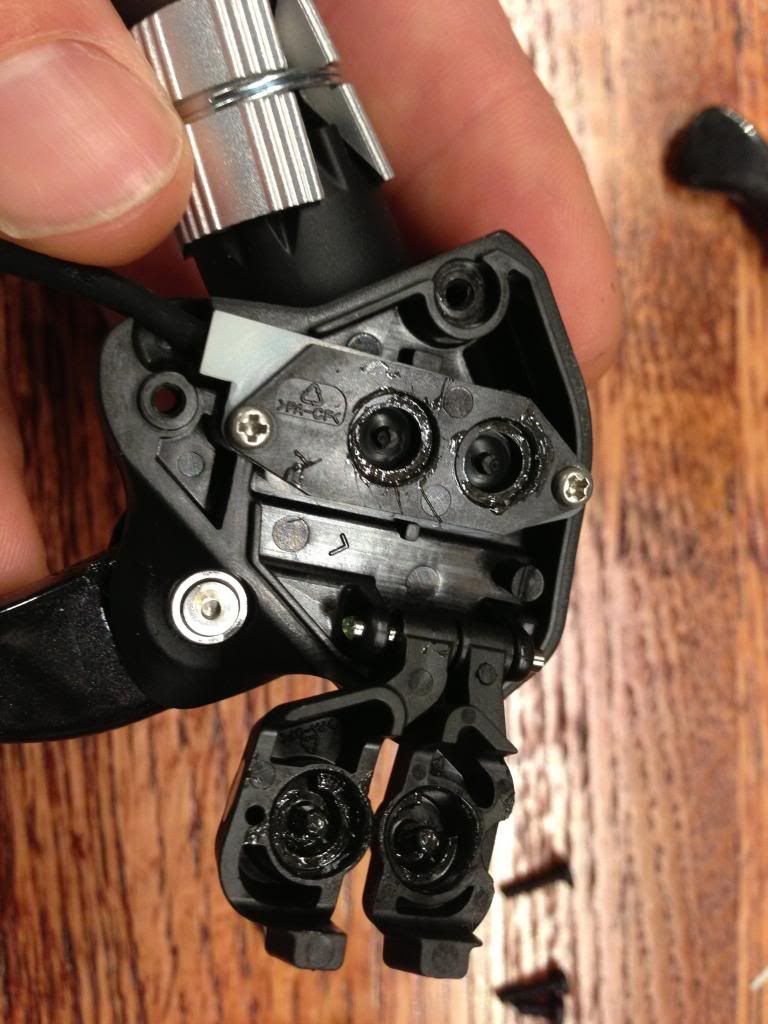
The Button cover will pop open like this:
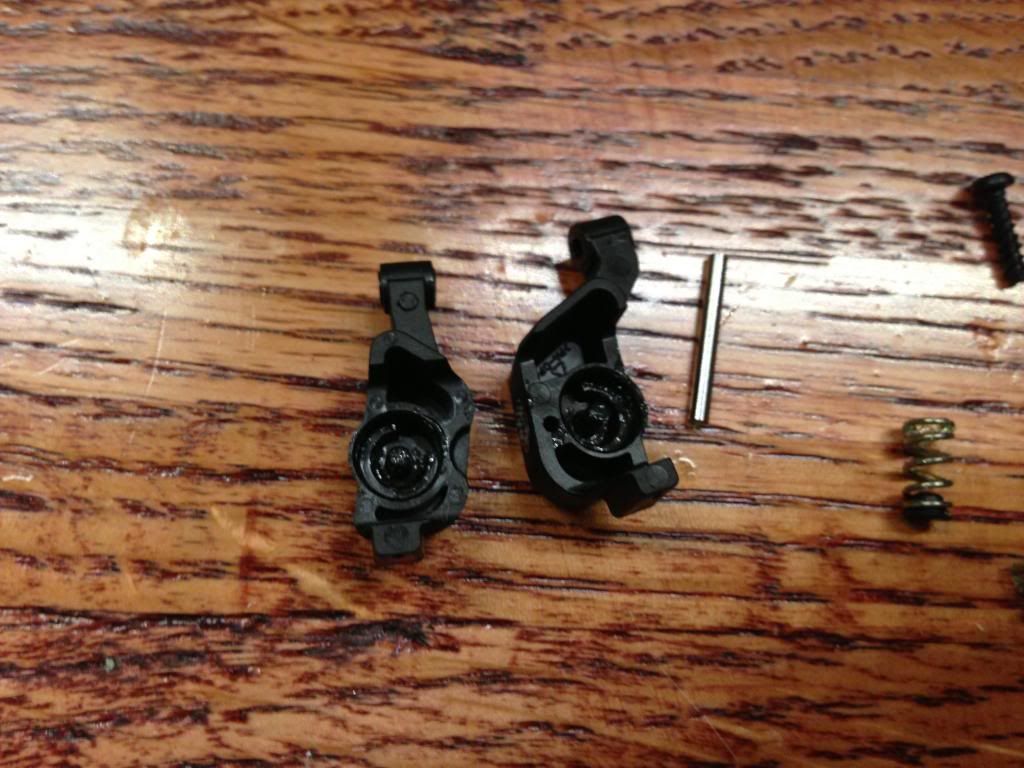
Remove the outer cover and large springs:
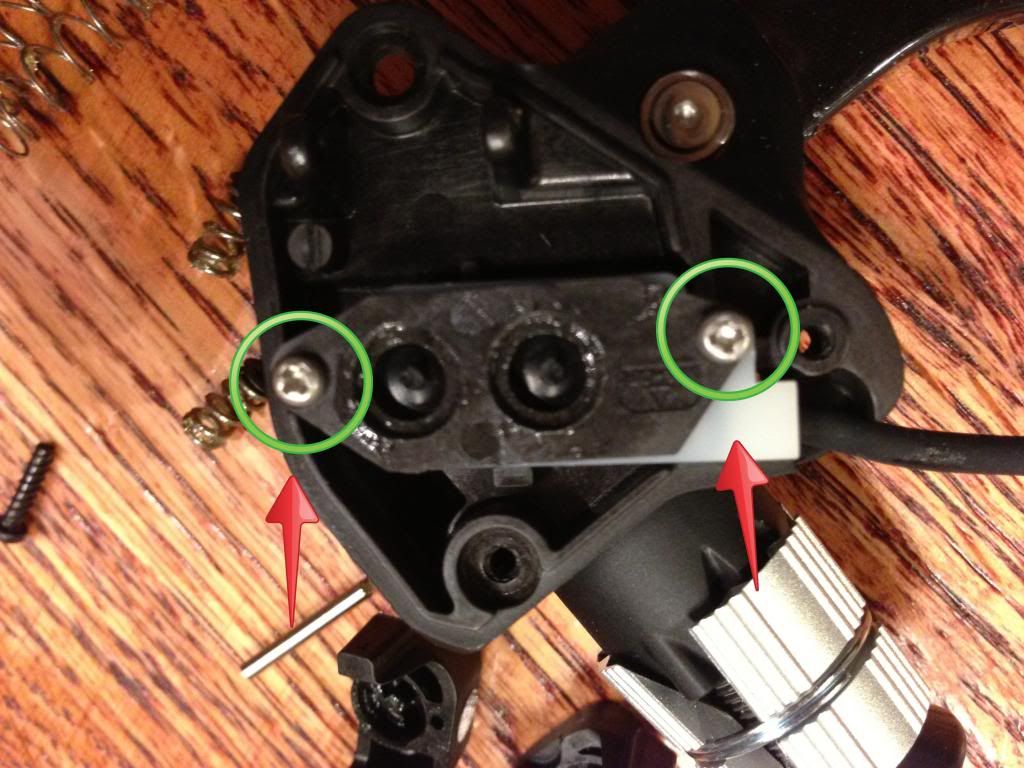
Remove the inner springs (green circle), they have a plastic piece inside the spring that holds it to the inner button, so just give them a tug to separate the two.
Also, slide the silver rod (blue arrow) out and the outer button covers will come off.
Remove the two silver phillips screws and take off the electronic shifting buttons:
The black piece on the left will come right off, the white piece on the right is what you will work with.
Carefully pry the white piece off of the device. It is glued on there. I used a utility knife to do this. You really won't hurt anything if you break the white piece while doing this, but it makes it cleaner if you can get the whole thing off the button system.
After it comes off:
Next use a small flat screw driver to separate the plastic piece of black plastic off the circuit board. It is held on by the four posts that the blue arrows point at. This piece is worthless and might break, but don't worry about it. Just be careful of the circuit board underneath.
Next, dump the little silver buttons off the circuit board, they were held there by the black piece you just removed, so they will fall right off.
Note the contacts that the red arrows point to, these are what you will be soldering your button to.
After the fact, I realized that I forgot to include photos of stripping to the wires of the buttons, but it is pretty simple. I cut of the connector, peeled apart the wires, and used my teeth to strip the wire. Here is the post solder photo. One button per contact.
Weather sealed:
Wrapped in Electrical tape to keep it safe.
I hate how hard it is to route the cables through the drop bar, but today it went pretty smooth. I pulled out the brake lever.
Fished the wire through:
Removed the back from the button, and slid it through the cable hole.
Buttons attached!!
Re: The official Cervelo P5 thread [veryoriginal]
[ In reply to ]
that is awesome. thanks for posting. I just have one question. It looks like you soldered the white wire to center contact on one button, is that the ground wire? I am asking because you soldered the red to the outside contact on the other. Just want to make sure. I am also guessing one could use any momentary switch.
thanks again
Rob
thanks again
Rob
Re: The official Cervelo P5 thread [drgwood]
[ In reply to ]
You can use any momentary switch. And the wire don't matter. I'm kind of OCD on that stuff and looking back I can't believe I swapped them.
Re: The official Cervelo P5 thread [veryoriginal]
[ In reply to ]
Re: The official Cervelo P5 thread [damon_rinard]
[ In reply to ]
damon,
was wondering if you had any data on running an aero bottle on down tube of P5 provided an aero benefit than no bottle?
soemthing like the new Arundel that the Garmin boys look like are using?
cheers
Rob
was wondering if you had any data on running an aero bottle on down tube of P5 provided an aero benefit than no bottle?
soemthing like the new Arundel that the Garmin boys look like are using?
cheers
Rob
Re: The official Cervelo P5 thread [drgwood]
[ In reply to ]
Hi Robb,
In our testing, adding any bottle to a modern tri bike's frame, whether round or aero, has always added drag compared to no bottle.
Adding a plain round bottle between the arms reduces drag. See the data here: http://www.cervelo.com/...nd-aerodynamics.html

Cheers,
Damon Rinard
Engineering Manager,
CSG Road Engineering Department
Cannondale & GT Bicycles
(ex-Cervelo, ex-Trek, ex-Velomax, ex-Kestrel)
In our testing, adding any bottle to a modern tri bike's frame, whether round or aero, has always added drag compared to no bottle.
Adding a plain round bottle between the arms reduces drag. See the data here: http://www.cervelo.com/...nd-aerodynamics.html
Cheers,
Damon Rinard
Engineering Manager,
CSG Road Engineering Department
Cannondale & GT Bicycles
(ex-Cervelo, ex-Trek, ex-Velomax, ex-Kestrel)
Last edited by:
damon_rinard: May 5, 13 13:09
Re: The official Cervelo P5 thread [damon_rinard]
[ In reply to ]
is there any reason in particular why my crnks feel like they have way more drag then they should, relative to other outboard bearing BBs? buddies p5 bearings are smooth and easy to rotate, mine fell like mashed potatoes in the way. maybe it is the darn ultegra chain i threw on there, may need to put one of my new dura ace ones on we are both using new bb30 quarqs too. still cant get that crank in or out even after several removals without a runbber mallet. is is possible to install the pressfit sram bb in a less than straight method? how to check?
it feels like 3-5 watts could easily get sucked up there
it feels like 3-5 watts could easily get sucked up there
Re: The official Cervelo P5 thread [damon_rinard]
[ In reply to ]
Damon,
Is there any data on what would amount to a P4-style storage box, � la the chap that built one himself awesomely making us all jealous at his creative skills? The pics he posted were about two or three weeks ago. At what point does drag spike with such a creation?
Dave
Is there any data on what would amount to a P4-style storage box, � la the chap that built one himself awesomely making us all jealous at his creative skills? The pics he posted were about two or three weeks ago. At what point does drag spike with such a creation?
Dave
Re: The official Cervelo P5 thread [veryoriginal]
[ In reply to ]
Incredible job on the electric shifting and the documentation!
Re: The official Cervelo P5 thread [hirochan]
[ In reply to ]
I was messing around with the e-tube program today and it treats the bar end shifters the same as climbing shifters. In fact if I UN plug one of the bar end shifters it doesn't realize that it is a bar end shifter at all and thinks it is a left or right climbing shifter. With the retune program it will let you search for up to 6 of them. Thus leads me to believe that it would be possible to use an extra set of bar ends instead of the brake lever shifters. Ill test this out later this week.
Re: The official Cervelo P5 thread [djmercer]
[ In reply to ]
Hi Dave,
As you might imagine, while developing the P4 bottle and the P5 BB gusset, we tested a lot of "stuff" here. I'm not at liberty to give in-depth information, but I can say this is an area where the details can make a real difference.
Cheers,
Damon Rinard
Engineering Manager,
CSG Road Engineering Department
Cannondale & GT Bicycles
(ex-Cervelo, ex-Trek, ex-Velomax, ex-Kestrel)
Re: The official Cervelo P5 thread [jeffp]
[ In reply to ]
Hi Jeff,
It is possible to install the bearings slightly crooked, if they aren't fully home (not actually likely, but possible). They should be pressed fully into the frame on the outer edges of the cups. Also, as you would expect, bearing drag can vary, and new and/or dry seals always feel stiffer than worn in and/or lubed. Your guess on the chain would be likely if it has a lot of heavy packing grease on it (I once measured more than 8 Watts after a good lube), but Shimano hasn't used that stuff for years.
That said it's hard to really diagnose over the internet; can you have your Cervelo retailer take a look at it?
I also often use a rubber mallet, so that part seems normal to me.
Cheers,
Damon Rinard
Engineering Manager,
CSG Road Engineering Department
Cannondale & GT Bicycles
(ex-Cervelo, ex-Trek, ex-Velomax, ex-Kestrel)
Last edited by:
damon_rinard: May 5, 13 18:36
Re: The official Cervelo P5 thread [damon_rinard]
[ In reply to ]
Jeff - eliminate the chain and "feel" your cranks. Just pop it off the small chainring and "gently" place it against the frame/bottom bracket. I don't recommend the "slam, slice and scrape" method that I employed on my ride yesterday when I dropped my chain and dug a hole to china in the carbon ;-0
Okay. I'm over it. Really.
Anyway...back to you. Drop the chain, and give the cranks a whirl. Compare to your buddies. Still feeling like mashed potatoes? (which are one of my favourites!) Take it in to the shop.
Okay. I'm over it. Really.
Anyway...back to you. Drop the chain, and give the cranks a whirl. Compare to your buddies. Still feeling like mashed potatoes? (which are one of my favourites!) Take it in to the shop.
Re: The official Cervelo P5 thread [damon_rinard]
[ In reply to ]
i did not use the local dealer, i travelled for it. I don't really want to go to the local dealer either. I will have the usual shop look at it I guess,
Re: The official Cervelo P5 thread [damon_rinard]
[ In reply to ]
any suggestion for a better quality replacement. i pulled the crank again and felt the bearings. 2 weeks old and never been in the rain or grit, yet already grindy as all get out. those things either went south faster than pt hub bearings or started that way
Re: The official Cervelo P5 thread [jeffp]
[ In reply to ]
I've had quite a few bearings that felt like that while installed, but took them out and they were fine, so put them back in and they were still fine. What seems to happen is that an installation problem can arise at some point after the initial installation, presumably due to some part moving very slightly. Another example is a wheel bearing I was going to take out because it felt terrible, I hit the inside to remove it, and it didn't visibly move at all, but the impact moved it enough that it was then spinning completely freely, so I no longer needed to remove it!
Re: The official Cervelo P5 thread [Steve Irwin]
[ In reply to ]
unfortunately, one of the tools I don't have. maybe time to get one, tool to install bearings
Re: The official Cervelo P5 thread [jeffp]
[ In reply to ]
Yeah having the same problem with my BB. At first thought it just needed to be broke in but I now have 500k on it and still way too much drag. Major PITA because the nearest Cevelo dealer is a 3hr drive :p
Proud Kiwami Ambassador/Team Member
ask me anything about:
https://kiwamitri.com
Proud Kiwami Ambassador/Team Member
ask me anything about:
https://kiwamitri.com
Re: The official Cervelo P5 thread [jeffp]
[ In reply to ]
Hi Jeff,
Sorry to hear of the bad bearing. It seems likely it might not have been pressed in evenly - misalignment leads to early bearing death.
I should point out this misalignment isn't an issue only with BBright, but can be an issue with any press fit bottom bracket.
One small thought - are your BB cups Delrin or alloy? If you have Rotor alloy cups, some early P5s had a step in the frame (a decrease in diameter) that will interfere with the cup. Delrin cups fit fine. Either needs to be pressed all the way in on their outer edge to guarantee bearing alignment.
Anyway, this step in the frame was decreased (diameter increased) in the second batch of P5s and the Rotor alloy cups no longer interfere. (At the same time, Rotor decreased the diameter of their newer alloy cups and they are now compatible with all P5s.) Cervelo, or any mechanic who wishes, can carefully file or grind the step in the frame if it's an issue with any bottom bracket installation.
I'm not sure if this might help explain your situation or not, but wanted to mention it in full disclosure in case it might help you.
Let me know how it goes,
Cheers,
Damon
Damon Rinard
Engineering Manager,
CSG Road Engineering Department
Cannondale & GT Bicycles
(ex-Cervelo, ex-Trek, ex-Velomax, ex-Kestrel)
Re: The official Cervelo P5 thread [veryoriginal]
[ In reply to ]
Thank you VeryOriginal for you outstanding post on the 9070 bullhorn shifter hack. I believe you said you would mess atound this week, but I am thinking the following would work:
Has anyone tested a similar hack using a second set of Shimano 2 button TT shifters, SW-R671? Secondly has anyone done this with two separate climbing shifters (that bulky box meant for a basebar on a road handlebar) which is SW-R600.
Both of these should have a similar circuitboard to decode signal from the cateye button pushes, but these options would be far less expensive than using the 9071 brake levers for the hack. I'm assuming the e-tube software would need to be used to update firmware and assign buttons either way. My P5 with 11sp Di2 is in the shop waiting for the final wiring decision to get bullhorn shifters, so I'm anxious to get this done!
Re: The official Cervelo P5 thread [damon_rinard]
[ In reply to ]
not sure of that except to say the bb has a ridge(lip) on the outside that is magnetic, as quarq mag sticks to it until it tries to jump onto spindle and I seem to need to have part of the magnet on the ridge to get it in correct spot for quarq. outside this ridge and the quarq spider hits it.(another story)
am I correct to assume that for a bb30 quarq, I should only need the wave washer on one side and the large spacer on the drive side? that is all that fits. time for more searches
am I correct to assume that for a bb30 quarq, I should only need the wave washer on one side and the large spacer on the drive side? that is all that fits. time for more searches
Re: The official Cervelo P5 thread [BamBamSP]
[ In reply to ]
My hold up is getting the hardware to test it everything at once. But the key element will be if the r600s can be set in a right/left aka front/rear configuration. I know that a second set of r671s can be setup this way in the software. I just confirmed that yesterday but I want to set it up in person just to confirm.
Just make sure they use a 5 port junction A box.
Just make sure they use a 5 port junction A box.
Re: The official Cervelo P5 thread [jeffp]
[ In reply to ]
Finally got a Picture of my bike all kitted out before a race this weekend.
If you want to see all 61 pictures of my detailed Bike Porn that I took this day, go here: http://share.shutterfly.com/...sid=wAYsmTdy2cNmbVyQ

If you want to see all 61 pictures of my detailed Bike Porn that I took this day, go here: http://share.shutterfly.com/...sid=wAYsmTdy2cNmbVyQ
Hi Jeff,
Neither the Delrin nor aluminum cups are magnetic, so unfortunately the magnet test won't distinguish between them. It might be the bearing's steel outer race (which is present in both Delrin and aluminum cups) attracting your Quarq magnet.
I've not tried it, but I've heard you can locate the Quarq magnet *inside* the rear brake cover. The Quarq apparently senses the magnet through the plastic cover. Another option is to epoxy the Quarq magnet on the "front" side of the frame's bottom bracket. One of our employees has his Quarq set up that way on his P5.
For the BB30 Quarq crank, you are correct: use only the large spacer on the right, the wave washer on the left, plus however many thin plastic shims are necessary to compress the wave washer without flattening it, when the crank is fully torqued. The number of shims can be any number, including zero, as long as the wave washer is compressed but not flat.
Damon Rinard
Engineering Manager,
CSG Road Engineering Department
Cannondale & GT Bicycles
(ex-Cervelo, ex-Trek, ex-Velomax, ex-Kestrel)