DISCLAIMER Damaged helmets should be discarded as they have lost the structural integrity intended by the designer to meet required specifications…
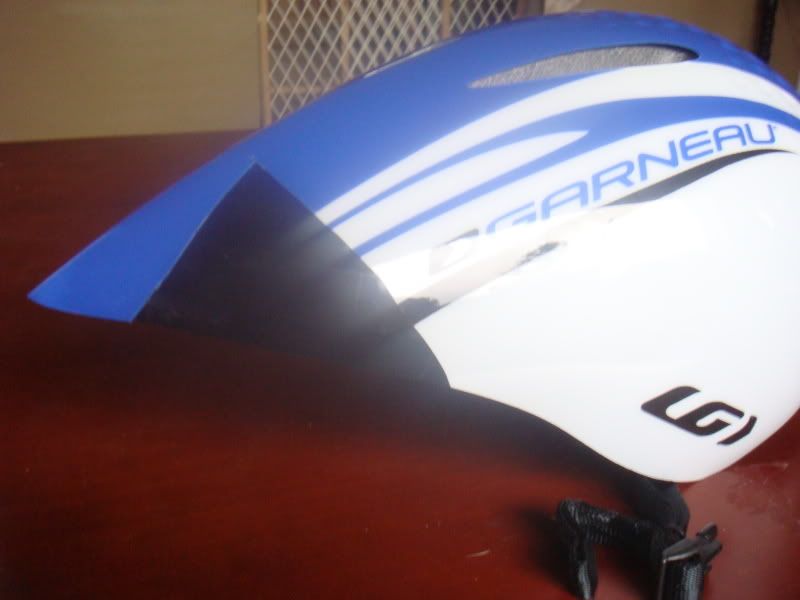
Ive noticed alot of people with broken helmets so i thought id share a bit of my auto body and collision repair with ya. ill be updating this periodically for the next few days as i work on it. ill be working on this LG Aero helmet i picked up off the classifieds.
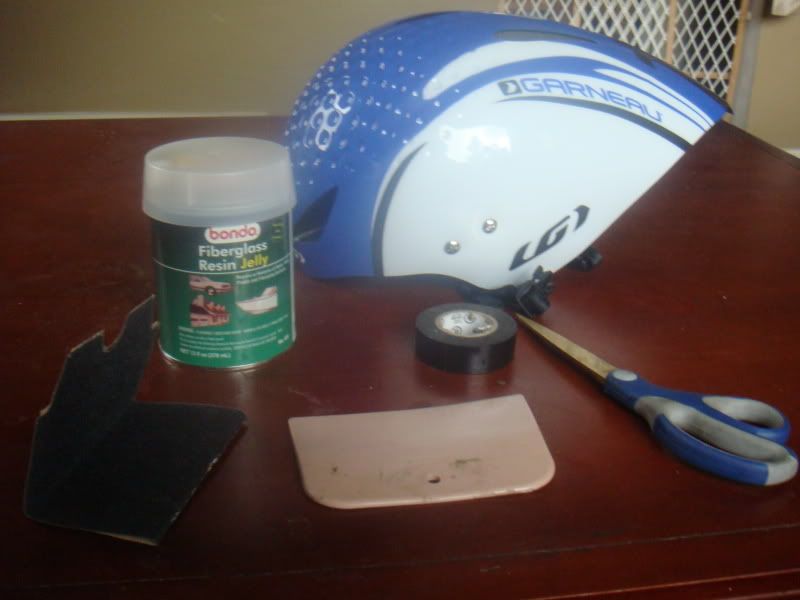
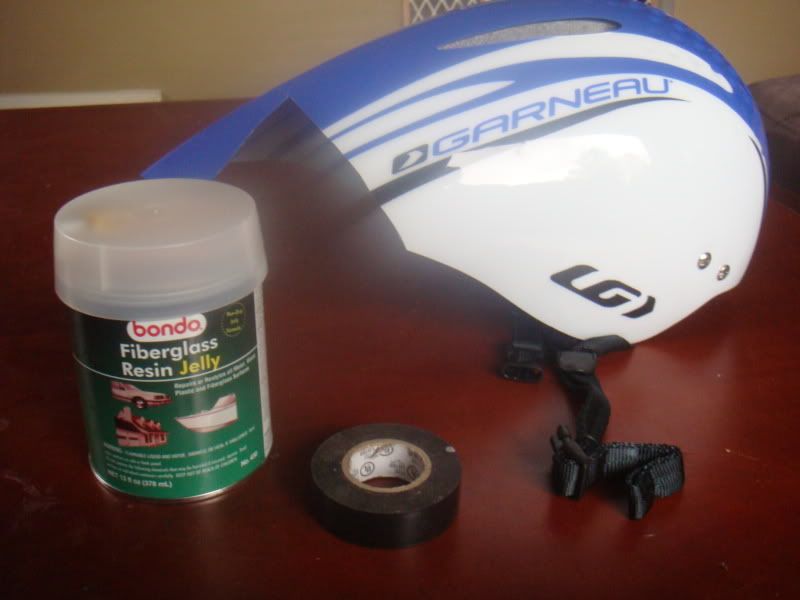
Step 1. Items you will need:
Helmet
Fiberglass Resin Jelly (Used for cars, boats, yada yada. Can be found at any auto place or walmart.Small can will do)
Hardner (used to harden the resin. Should come with your fiberglass.)
Electrical tape (You could probably use whatever you have around.)
Scissors or razor blade
Bondo Blade (Used to smooth the bondo over the damaged area…Could use just about anything straight. I used my fingers most the time.)
Sand paper (I used 100 grit just because its what i had. Id say 320 would be a nice grit for what we are doing)
Plate or cardboard (Make sure you use a plate your wife will not be mad over.)
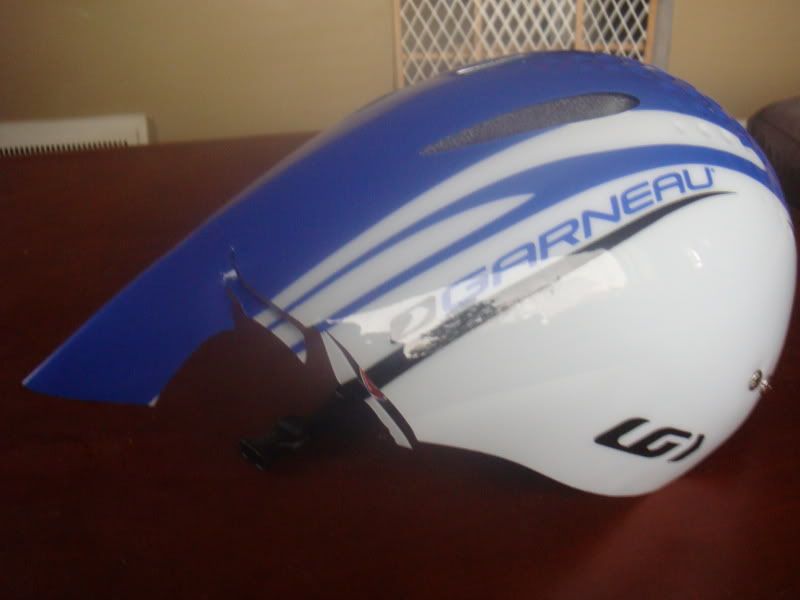
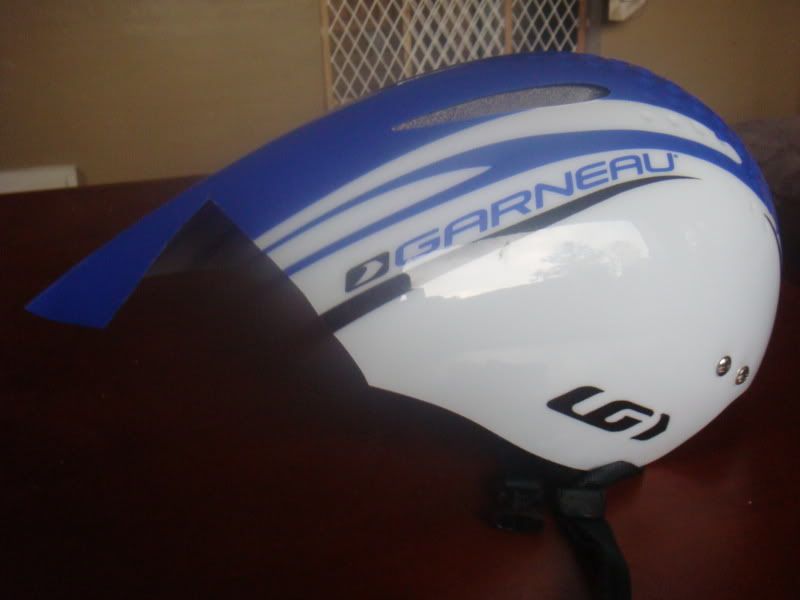
What it looked like to start:
Start by cleaning up the area by using your scissors to clean up the area. How much you cut is your call. I like my area to have no extra pieces but i probably could have skipped thhis step and moved on. Sand around the area bondo will go on. This wll be what the bondo grabs onto. If you skip sanding, the bondo could just simply peel off.
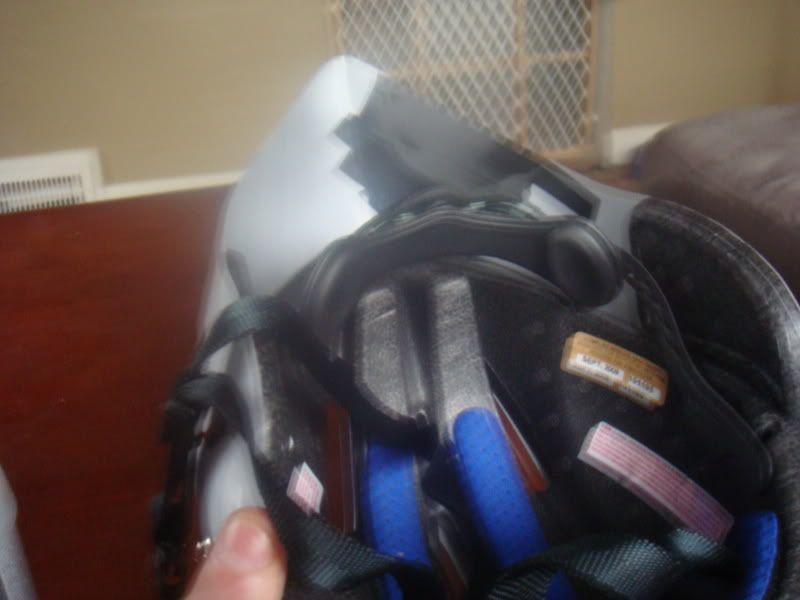
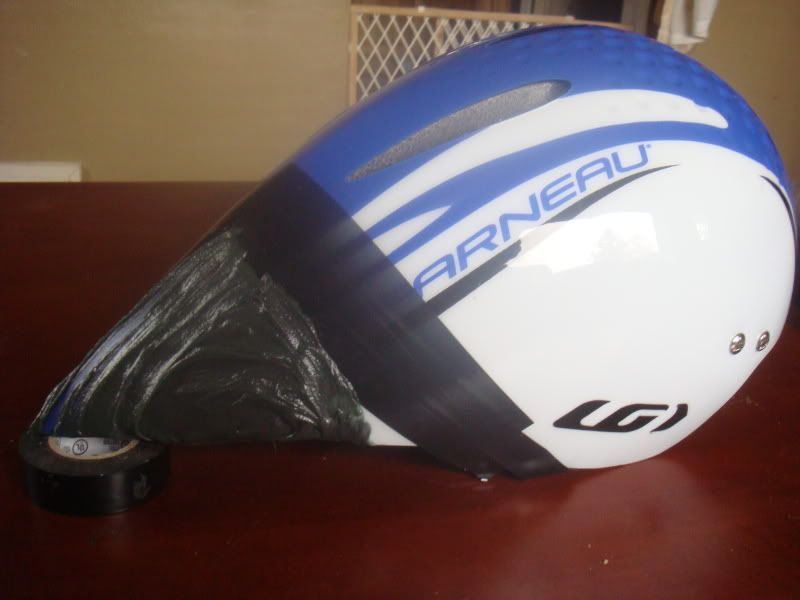
Electrical tape or other tape. Flip over your helmet from the inside and line it cleanly with your tape. At the end, you should be able to pull this right off.
Prepare for bondo. If you have never used bondo, practice on a piece of cardboard to just to get it down. Its messy, it smells like something a teen age kid would be huffing, and is an all around pain in the butt. Probably should do it outside. Hardner is the difficult part. Judging how much needed is the problem. To much hardner and it will be like a rock before you can finish your area. Too little and it wont harden at all or will take forever. My rule of thumb is simple. The fiberglass is green and the hardner is red. Mix hardner in untill it is a dark green.
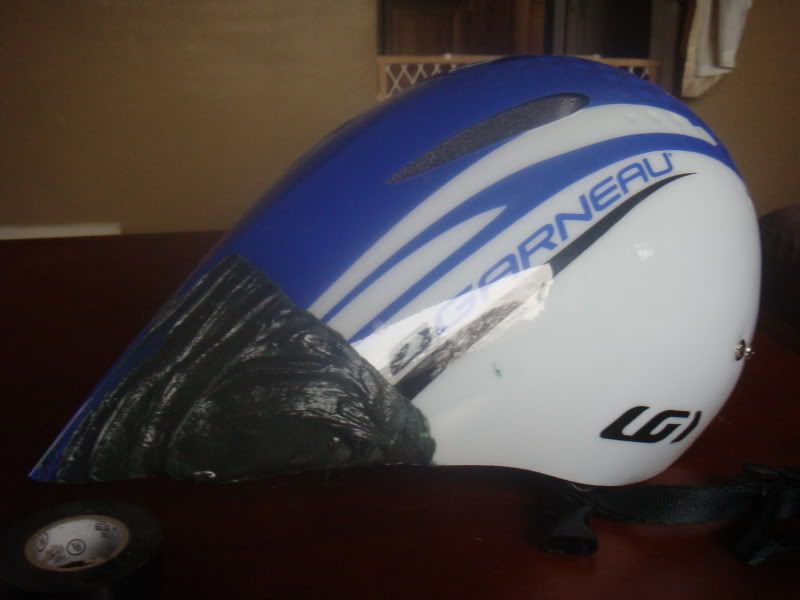
Lay bondo. I used my fingers for this mostly. Dont press to hard on your taped area or you will end up needing another coat (which you may need to do anyway). Slow is smooth and smooth is fast when it comes to bondo. Use a plate your wife wont miss or yell at you for to mix it up with a paint stick or whatever is around.
Let harden. Not much explanation here. Let it sit anywhere from 20 minutes-overnight. Its really up to you and how much hardner you used. I have other stuff i gotta knock out today so i will come back to it later tonight to hit it with sanding and another coat.
A broken cycling helmet is like a broken hard hat in industry…it shouldn’t be used. If you want to place your safety over a few bucks, go for it…but broken helmets should be discarded as their integrity has been compromised.
I’m intrigued and would like to subscribe to your newsletter…
Related: I have in my possession a Giro Stylus helmet, a little over a year old, with a dent in the front, right in the middle. It also has blood splatters covering the inside, but I think the USCF sticker is still readable. Would you suggest I fix the dent using the technique described above, and use a cleaning product to get rid of the blood, or should I discard it as hazardous waste?
If I remember correctly this helemt was crunched/broken in a bike case and not due to a crash. I’d love to see the end result. Throw some paint and make it bitchin!
Well, I’d definitely be interested to see the rest of the series.
Will do.
I’m intrigued and would like to subscribe to your newsletter…
Related: I have in my possession a Giro Stylus helmet, a little over a year old, with a dent in the front, right in the middle. It also has blood splatters covering the inside, but I think the USCF sticker is still readable. Would you suggest I fix the dent using the technique described above, and use a cleaning product to get rid of the blood, or should I discard it as hazardous waste?
Yours truly,
I. G. Noramous.
Let me start by saying i stand by my disclaimer to get rid of damaged helmets.
With that being said… Without looking at it, if its a dent and not cracked i would say your good. I used fiberglass resin because i have a case of it thats been sitting around for years now. In your case, id use what they call “Glazing putty”. Its a straight up regular bondo used for final finishing and goes on super smooth. Since yours is a dent id say you could use that. Since this is my first project like this, im not sure how it will work, so if your worried then use the method above. Sometimes dents can be more of a pain thank creating a new line so be patient. Good luck!
If I remember correctly this helemt was crunched/broken in a bike case and not due to a crash. I’d love to see the end result. Throw some paint and make it bitchin!
Yep, without looking at the ad, i think it was crunched in transition while he wasnt around or in a case like you said. i plan on doing a pretty sweet car quality paint job lol. Maybe ill leave the design up to slowtwitch…It will be covered in “htfu” and other good stuff. Should be pretty fly.
Would you concede that one should not/can not race in said helmet?
Why not? If the damage is the result of a crash in which the riders head struck the ground then I agree but in the images, it appears to me that the damage is purely cosmetic - possibly a result of being placed in an overhead on an airliner after which a carry-on is stuffed beside the helmet compressing/cracking the ‘fairing’. Assuming the damage was not from a crash, since the damage area is well outside the protective foam shell, seems unlikely that the integrity of the shell has been compromised so why not repair it?
Let me start by saying i stand by my disclaimer to get rid of damaged helmets.
Huh? Wut? I’m not very good with big words?
With that being said… Without looking at it, if its a dent and not cracked i would say your good. I used fiberglass resin because i have a case of it thats been sitting around for years now. In your case, id use what they call “Glazing putty”. Its a straight up regular bondo used for final finishing and goes on super smooth. Since yours is a dent id say you could use that. Since this is my first project like this, im not sure how it will work, so if your worried then use the method above. Sometimes dents can be more of a pain thank creating a new line so be patient. Good luck!
Well, the foam is dented, but the cover is cracked. But that’s very thin anyways, so that shouldn’t be a problem, no? I think that’s there only to give it the pretty colors anyway.
Would you concede that one should not/can not race in said helmet?
Why not? If the damage is the result of a crash in which the riders head struck the ground then I agree but in the images, it appears to me that the damage is purely cosmetic - possibly a result of being placed in an overhead on an airliner after which a carry-on is stuffed beside the helmet compressing/cracking the ‘fairing’. Assuming the damage was not from a crash, since the damage area is well outside the protective foam shell, seems unlikely that the integrity of the shell has been compromised so why not repair it?
Ive learned its best to list a disclaimer rather than argue lol…I think anyone could reasonably say the area damaged wouldnt directly cause loss of protection. Id say my road helmet would be less protective than this even as sits. But thats just opinion.
Let me start by saying i stand by my disclaimer to get rid of damaged helmets.
Huh? Wut? I’m not very good with big words?
.
A disclaimer is generally any statement intended to specify or delimit the scope of rights and obligations that may be exercised and enforced by parties. Meaning im not responsible for what you do with my guide.
Repair it? Fine - I’m looking forward to the rest of the post. Race in it? Absolutely not. To begin, its against the rules:
5.9. Helmets.
(a) Type of Helmet.
All participants shall wear a protective head cover, undamaged and unaltered, which meets or exceeds the safety standards of the Consumer Product Safety Commission (CPSC).
…and even if you don’t care about rules designed for your safety, at what point do you decide if its cosmetic versus structrual? I haven’t crash tested a helmet in a lab, so I know that I don’t know.
Would you concede that one should not/can not race in said helmet?
Why not? If the damage is the result of a crash in which the riders head struck the ground then I agree but in the images, it appears to me that the damage is purely cosmetic - possibly a result of being placed in an overhead on an airliner after which a carry-on is stuffed beside the helmet compressing/cracking the ‘fairing’. Assuming the damage was not from a crash, since the damage area is well outside the protective foam shell, seems unlikely that the integrity of the shell has been compromised so why not repair it?
Is the bondo that flexible that it can act as a replacement for this helmet material? I know that the aero tail of this helmet is pretty flexy and it is amazing to me that some substitute material can fill a big missing hole, be very thin, be very flexible, and yet not crack or detach itself. How can this work?
I’m curious to see also. Bondo is probably 1/8 inch…it seems to bond very well when you extend the bondo area past the cracked area. I’ve flexed it a bit to see and doesn’t crack. We shall see tho.
Yes, the 40 minutes I have in it is so crazy and the 4 minute primer is going to break my bank. # pink You trolls grow by the day. Take the fun out of the forum. Don’t like my thread? Don’t read it. Thanks for the bump
I commend your efforts, but dude… That’s so gonna crack unless you handle it very carefully. It’s just a matter of time. I wouldn’t repair a helmet… But, if I did- this is what I would do.
Cut out the area as you did. Get two pieces of lexan plastic. Put one piece INSIDE the helmet and glue it in place with CA glue you can get at a hobby shop. It is like crazy glue. The second piece of lexan, glue to the first piece on the OUTSIDE of the helmet within the damaged area. Leave a small gap between the new plastic and old plastic. Fill this gapped area with the bonds and sand it out. Then, paint your helmet. The bad news is, helmets are painted on the inside and the lexan gives the helmet it’s shine. So, if you want a shine… You need to paint it and use a clear over the paint since this paint will be on the outside of the helmet.