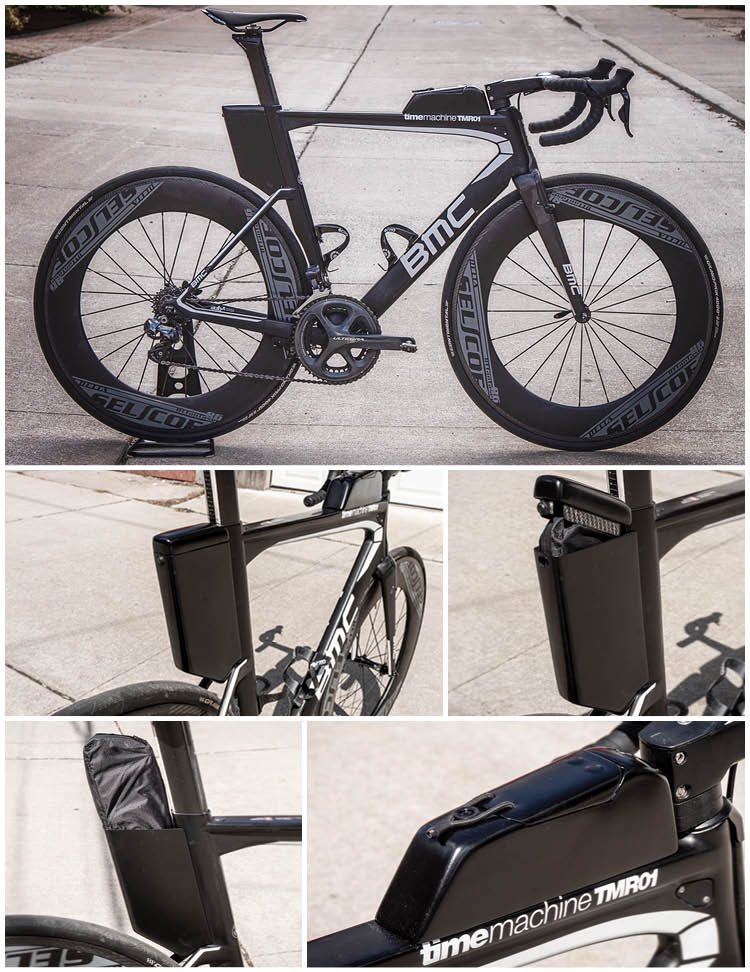
The process for making carbon fibre bicycle parts can be complicated. When you add in the one-off custom element, this process not only needs to be the concept and prototype stage, but also the final production. This is the process from start to finish for creating the tailbox and lunchbox for my BMC TMR01 road bike. This covers the methods and process from initial shape definition and design, mold making, carbon layup and finishing. All work was done at home with limited tools and shows that with a bit of creativity you can make it work.
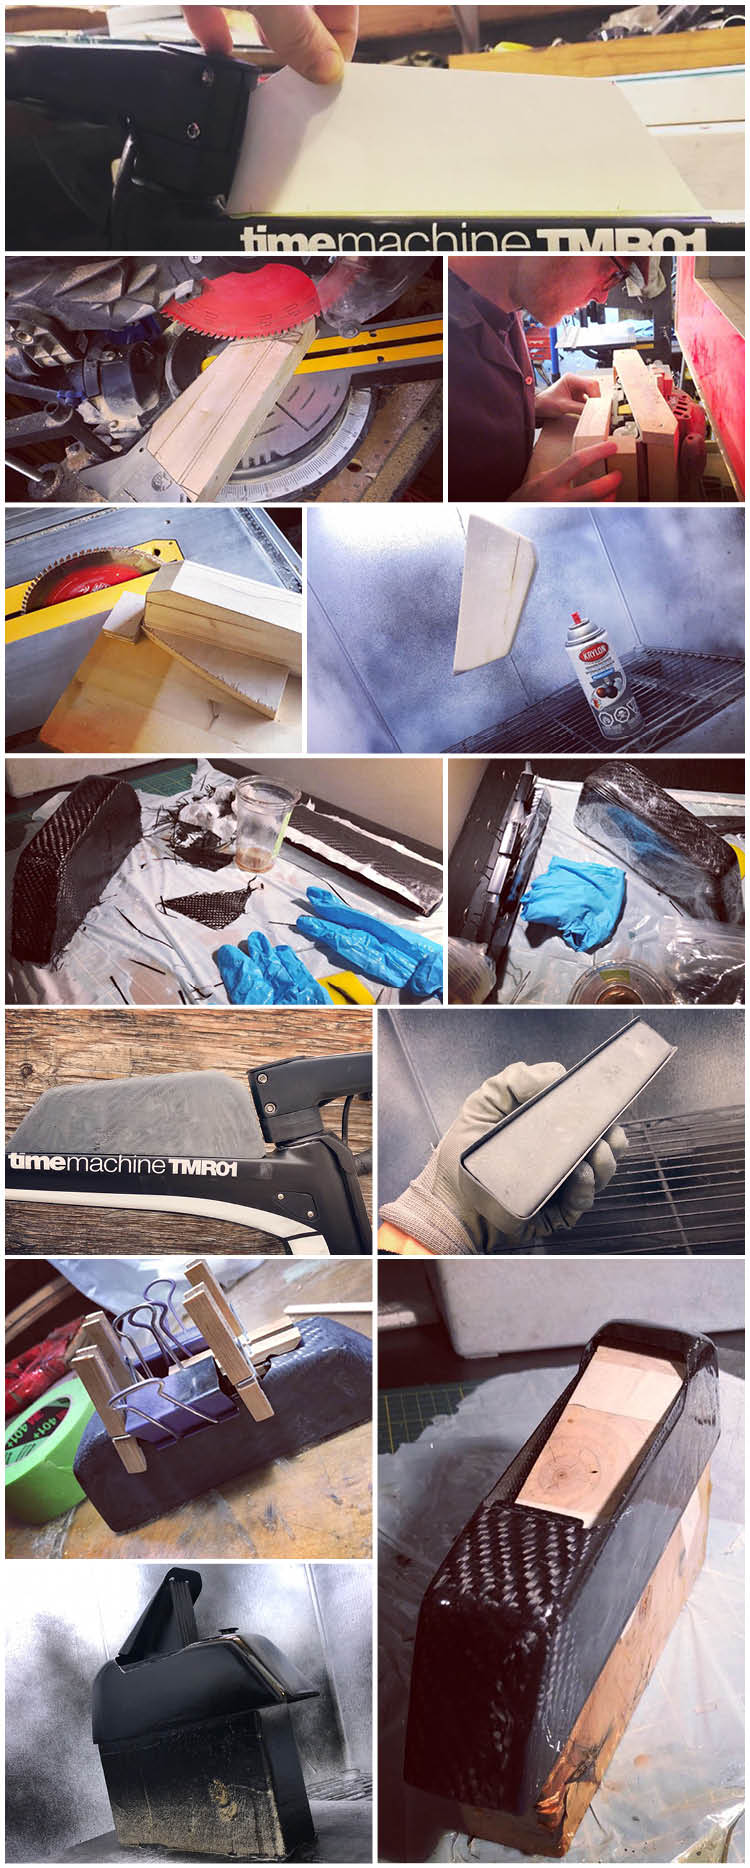
The first step is determine the final silhouette.
After working out the panels in 3d with paper, the shape gets transferred to a wood block to create the plug that will eventually get built up with carbon fibre fabric.
Using the fence for guidance, the wood block gets cut to shape to form the mold.
In this case, the mold has multiple compound angles and tapers. This photo is shaping the vertical plane to narrow at the top.
The mold also gets tapered from front to back on a table saw.
Once happy with the shape, it gets sanded and painted to seal the wood.
Although a wet layup is not optimal, it works just fine for a one off/non structural part like this.
Once the carbon is applied and ready for cure, it gets tightly wrapped with a peel ply fabric that firmly holds the carbon in place while it hardens.
After cure, a bit of a trim and sanding, you get something that resembles the final part.
Once you are happy with the shape, the bottom gets bonded in place. This box will be adhered to the frame using double sided tape.
The lid gets cut out of the box and support rails are added.
Because this part has been sanded heavily, I applied a final clear coat to seal the carbon.
All ready for finishing.
Satin black paint with satin clear to match the frame.
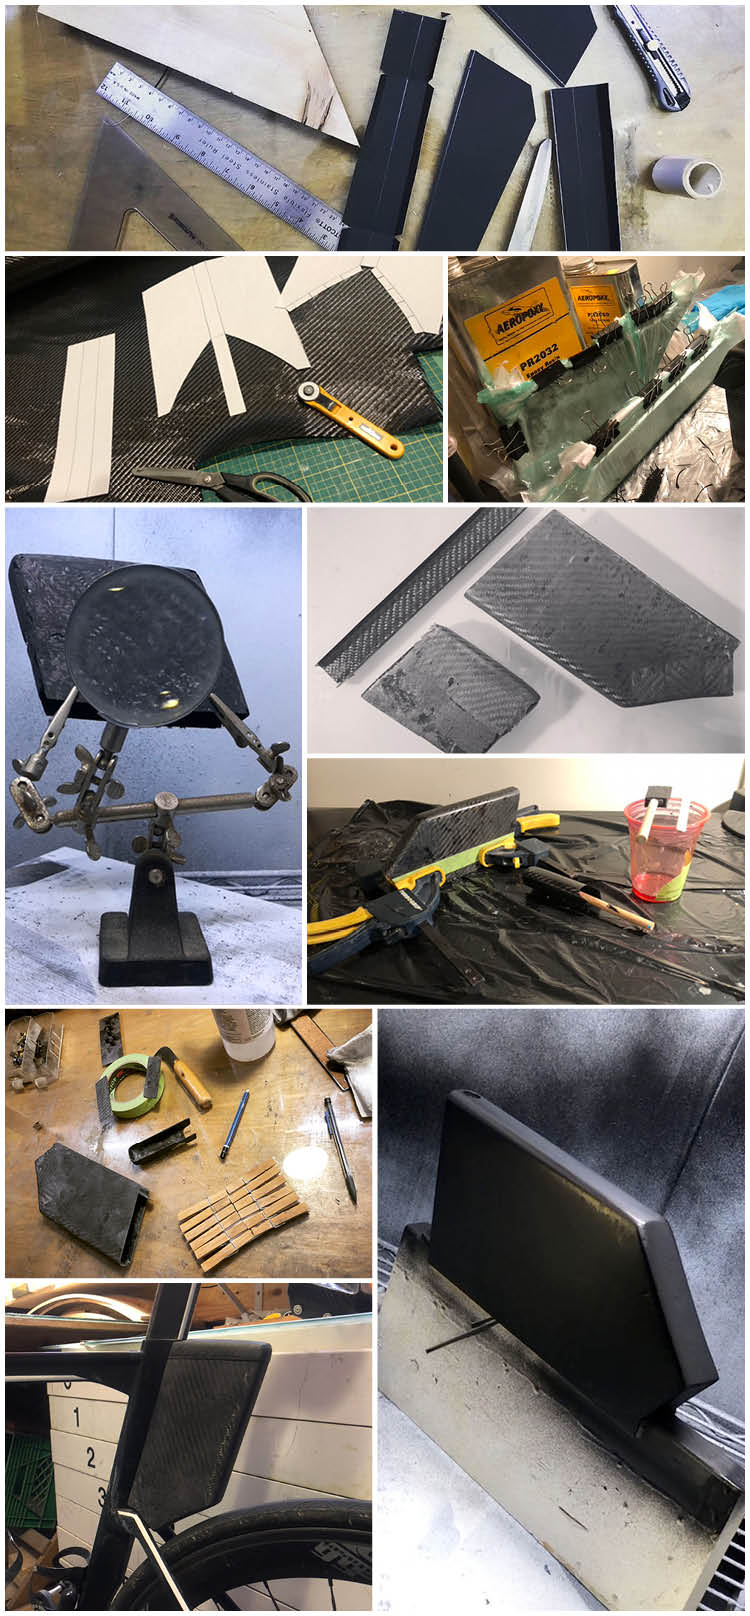
The steps for the tailbox are mostly the same, creating the mold and preparing the carbon for lay-up.
This shape is mush simpler and I was able to use simple compression to set the wet carbon in place.
Three parts fresh off the molds, box, lid and spine.
The weave of the lid was lined up to insure the same look as the box (however I decided to paint it in the end and it’s not visible).
The spine gets bonded to the box. As with the lunchbox, this one will get adhered to the frame with extra strong tape.
Support rails bonded in to help keep the lid and box aligned.
Final test fit with all components in place.
Final finish to match the lunchbox, satin black with satin clear.
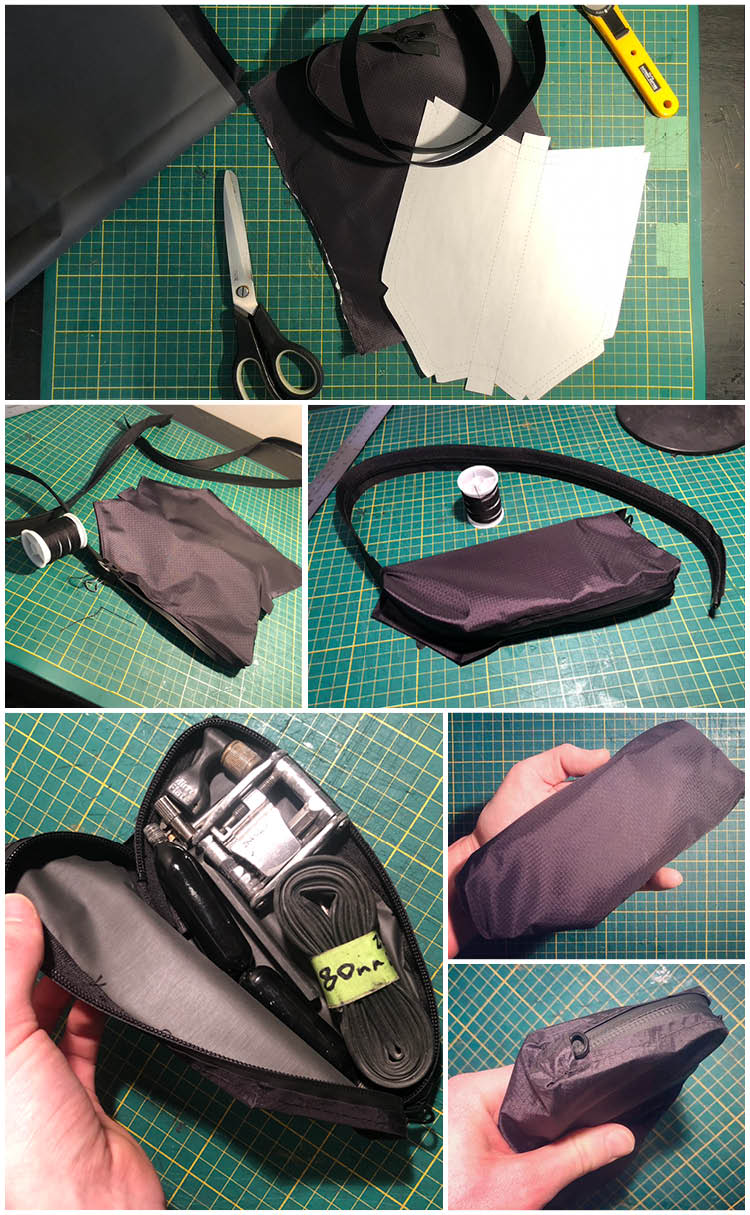
For this tailbox, I thought it would be handy to have an inner pouch for tools and tube. It makes it much easier to access everything and faster to get what you need.
The fabric is a Gore-Tex I had lying around from another project and waterproof zipper.
It should help keep everything dry inside, but allow moisture to escape if any condensation builds up.
Because I don’t have a sewing machine I needle and threaded it. Worked out well enough and will do the job.
Foam is a great idea, just have to seal it. You can use the home insulation boards too as long as you are using a self curing resin that doesn’t need to be put in the oven (that foam can melt in high temperatures).
I was intending to do a “draft box” of that sort of shape for my Felt IA, but it never happened due to time getting away from me, so in the end I bought the Felt box. It’s not ideal, but it’ll do.
My plan, was to built a spine that attaches to the bike and onto which you strap your multitool, CO2, tube and tyre levers, and then a carbon or glass fibre sheath to slide over it. I’ve always found narrow tubs attached to the bike a bit clumsy for getting things out. However your liner bag looks like a good alternative for avoiding this issue! Well done!
Just used the Gorilla double sided tape. It holds 30lbs per inch so plenty strong. It can also be removed without damaging the frame or part and doesn’t seem to be effected by weather. I first tried using a BOA closure system, then shock cord, but the tape looks and works best.
There is self curing/2 part epoxy that cures at normal room temperature over 12 hours. I use AeroPoxy since it has a high heat resistance once cured. I feared that once out in hot sun it might soften the part (100 degrees +), but AeroPoxy has proven very good. The pressure is more to compress the carbon and create a solid strong part with no voids between carbon plies. This is different for pre-pregnated carbon and other types of epoxy.
There is self curing/2 part epoxy that cures at normal room temperature over 12 hours. I use AeroPoxy since it has a high heat resistance once cured. I feared that once out in hot sun it might soften the part (100 degrees +), but AeroPoxy has proven very good. The pressure is more to compress the carbon and create a solid strong part with no voids between carbon plies. This is different for pre-pregnated carbon and other types of epoxy.
Thank you very interesting.
I once polished aluminium parts but you have to lacquer afterwards to avoid it oxydizes and gets dull. There is a transparent spray that is rather soft though after drying. There is a special transparent spray for motorblocks which hardens when it gets hot. I put the parts in an oven and that worked. But I would not do that in the kitchen oven anymore because it is hard to get the smell out.