Sorry for the poor quality of the pictures, but it’s the best my phone could do.
I know it isn’t very good, but I got bored and thought I would try to make a disc cover. I wanted to practice with cardboard before I actually try to make one with plastic. Keeping it together I have some duct tape and the green string is actually weed eater string. On the non-drive side I cut a small slice out of the cardboard, so when I formed it over the spokes it would have a smoother shape and wouldn’t fold over anywhere.
Well have at it, say what you think, and if you have any other suggestions just let me know. I don’t have very many tools as you can probably tell by what I have done.
Oh one more thing, do you think this will actually be more aero?
http://i56.tinypic.com/119xh76.jpg
it is not pretty but it should work!
maybe tape over the string?
I was thinking the same thing, but I ran out of tape. Thanks for the feedback.
I was thinking the same thing, but I ran out of tape. Thanks for the feedback.
You ran out of duct tape? Sir, turn in your man card immediately.
Here’s my homemade carbon fiber version:


.
Wow that’s really nice, I think I’m going to make my actual one out of plastic because I don’t have the tools to make it out of carbon fiber I don’t think. Yours looks way better haha.
And about the duct tape, I’m at my brothers house so it’s not my fault I ran out ![]()
Edit: By the way how did you make it out of carbon fiber? Like what tools did you use and how much did it roughly cost you?
I’m pretty sure if you go to any hardware store, you can find plastic screws and bolts that will replace your string. Go see a video on wheelbuilder covers and see what they use.
Have you given any thoughts as to what might happen if it gets wet?
Yes, I’ve looked at wheelbuilder, and I am going to get some of the fasteners that they use. I know it will get destroyed when if it got wet, but I’m not actually going to keep it on, I wanted to practice with cardboard before I go about actually trying to make it out of quality plastic or whatever. Don’t worry it isn’t going to be on my bike for long, just wanted to practice making one before I make the real thing.
I’m really a fan of DIY stuff, but if you are using plastic, why not just order the cover from Wheelbuilder?
I would, but I’ve ordered a SC (should be picking it up today hopefully!), and I’ve read that the disc cover doesn’t fit because of clearance issues. So I am debating about trying to make my own where I hopefully won’t have clearance issues. So we will see how that goes. If it doesn’t work I will probably buy a disc from flocycling once they start selling. Do you have any other recommendations of what material I should/could use to make the cover out of?
I would think it would be easier to do carbon fibre than plastic. Since you’re trying to improve aerodynamics the trick with any material is to make the disk cover slightly lenticular (convex) in shape. If you’re doing this as a DYI project, I’d start with a wooden form and simply lay up some carbon fibre sheets on it. Where I live (Ontario) I can get them at auto repair shops, or some hardware stores (i.e. Canadian Tire).
P.S. The cardboard version is a good prototype but it made me think of this picture:
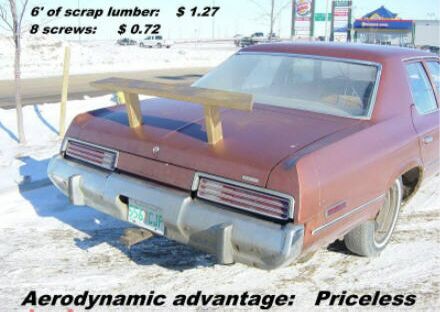
Thanks for the feedback, I might have to try it with carbon fiber then. Do you think I will have clearance issues on the SC? Love the picture by the way haha.
i had a chat with a local boat/surfboard builder about this topic. he gave me 20 ideas and was willing to make it in carbon for me if i just paid for the materials. he would make a mold from what ever wheel i wanted. after pricing up the carbon, resin, and the custom mold…its was cheeper to buy a hed jet disc.
by the way, I buy duct tape in rolls of 10. it’s the man thing to do!
Why do you have clearance issues with a Wheelbuilder cover, and how could you fix that with a home made one?
I made a cover out of thin ABS plastic but was not real happy with the results. Making a perfect cone shape (without wobbles) is tough.
Whatever you use, you want to hold it on with high quality electrical tape… don’t use fasteners.
I haven’t tried the wheelbuilder cover yet because I don’t have one, but I asked them if it would work on a SC and they said there isn’t enough clearance because of the built in sensor, and there was a thread about it as well. I was wondering if it would be possible to make the cover just slightly less lenticular than the wheelbuilder version and see if that would resolve the clearance issues. Again it was just a thought and have no idea if it will work yet, since I don’t even have the bike yet. And thanks for the tip on the electrical tape. So do you just use the electrical tape and that’s all? or did you use something else and then just sealed the sides with the electrical tape?
Tape only. Do the DS first using tape around the edge and on the inside, over the spokes. Then do the NDS just around the edge.
Do you have any other recommendations of what material I should/could use to make the cover out of?
From a 2004 posting on another forum, where I describe the J-Disk-ish homemade disk. If you do a search for this on slowtwitch,
you’ll find a post of mine with a link to this info, and a response from Tom A. describing how he did it with Monokote.
"I have done this with the ubiquitous Open Pro PT wheel. The surface
came out absolutely drum-tight, with not a wrinkle on it. I’ve used it
quite often in training and one TT.
Facts, issues and solutions:
- Ultracote has interesting temperature properties. The (self-)adhesive
backing works at something like 200 degrees (all in F), and doesn’t seem
to stick to Formica. The material itself shrinks more with higher
temperatures, all above the temperature that the adhesive works, so
avoid ironing any joined edges (see below) as much as possible. So,
shrink with the lowest possible temperature, so that if you need to
reshrink it again, you just have to turn up the temperature some.
Amazing stuff, really. Oh, melts at about 500 degrees. - I was told that the translucent colored material is harder to work
with than the shiny stuff, so I went with black. They do have a carbon
weave pattern, though! Twice as expensive. - To prevent scratches while ironing, put a “sock” on the iron (unless
you have really big feet or a very small iron, use some other article of
soft clothing). - I glued a strip onto an old wheel (between the hub and one bit of the
rim) to see what gluing and ironing was like, to gain experience. I
recommend this highly. - “Dish” the covering by cutting out a narrow pie-shaped wedge, and
joining the edges to create a cone. Be sure to overlap enough in case
the adhesive slips a little when ironing. I made a template out of
corrugated cardboard that is the shape and size of the finished material
before dishing (it has an ever-so-slightly larger hole in the middle for
the hub, and the pie-shape cut out). Dishing prevents wrinkles near the
rim from excess material that won’t stretch out. - Leave plenty of material to ensure enough coverage of the rim. I
found a box cutter blade cuts excess off and tracks the edge between the
rim and the braking surface quite well. - The Ultracote is not wide enough to span the whole wheel, by about two
inches. Solution is to use as big a piece as possible, then adhere a
small strip to the flat edge. - A single yogurt container should be enough for the two hub circles and
the valve opening: lid for the non-drive side, bottom for the
drive-side, and the rim of the container for the valve opening. I used
a 1lb container, but the smaller ones might work, too. - Cover the side where the valve opening goes first, then adhere the
valve opening ring inside that. Cut, fold inside the ring and adhere
with contact cement. - Use plenty of contact cement on the edge (also used on the converted
yogurt bits). Be very careful not to let the material touch the
contact cement until it is in the right position. Two people would be
nice, but I did this by myself. - Glue the hub rings onto the material, then put the ring/material onto
the wheel. I didn’t glue them to the wheel, but I made sure they were a
tight fit. - To spread any excess material around the circumference of the rim,
pull the material relatively tight and adhere at 12 o’clock, then 6
o’clock, then 3 o’clock, then 9 o’clock, then do the rest in between. - Let it set.
- Ironing is a stressful task the first time you do it. At first,
nothing seems to happen. Then, the thing starts to wrinkle up (“What
have I done?!?”). Then snap! it starts to shrink quite quickly, and it
is very satisfying to see the tightness. Keep the iron moving, but you
don’t have to go fast. Remember to use the lowest setting that’ll get
results (like 3-4 on an iron that has six settings). - I ironed the rim where the material was glued; I think this stretched
out any bumps. - The material is very strong, but don’t just toss the wheel around.
You can patch it by ironing on a small scrap (use the adhesive backing). - I use some kind of old thin vinyl-like adhesive material to cover
the valve hole, not duct tape.
Way back in '92, I fashioned my own “J-Disc” type wheel cover…used a piece of wire coat hanger to go around the hub and used plastic window film over the spokes. Taped it to the rims and blasted it with a hair dryer.
The course was in Alamosa, CO and was dead flat and dead straight. Only turn was at the turnaround so I wasn’t worried about not having a rear brake. Used my front to scrub off some speed before the turnaround and I was good to go.
My time still sucked though…
;^)
Thanks for all the info guys! Definitely a lot of good advice.