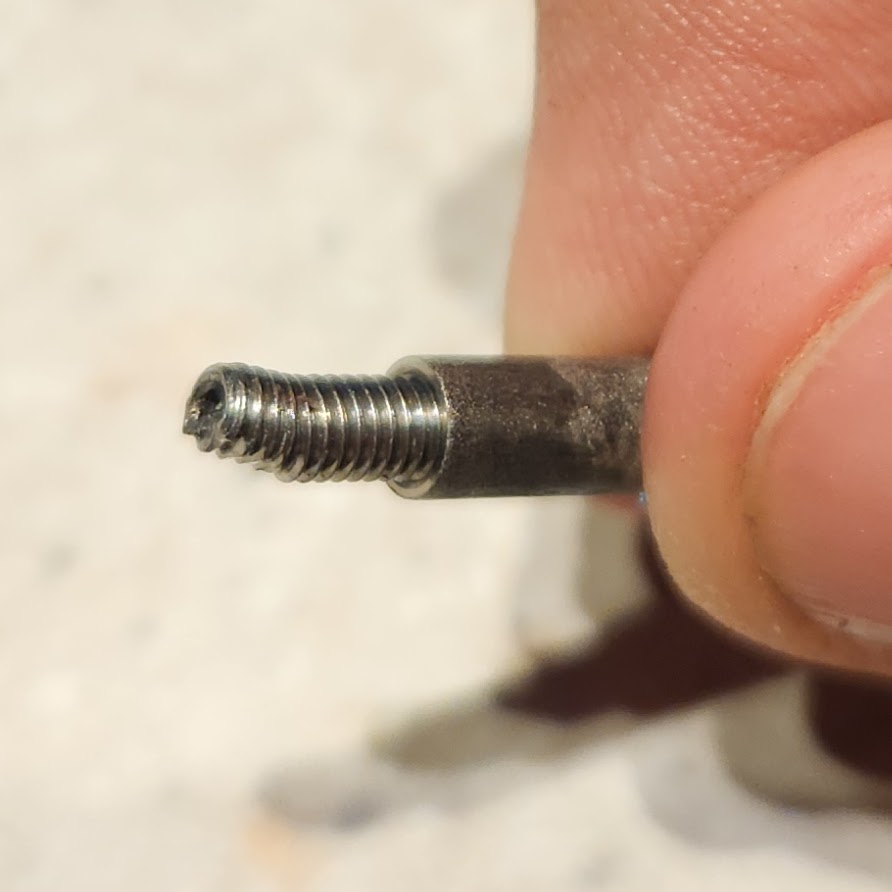
2010 Plasma 2. The adjustment screw was bent and in trying to remove it, the sleeve that was epoxied into the hole also came out. It’s probably been like this for years, but I never had an issue with it until I tried running 25c tires and they started rubbing (crazy that 25c is too wide for this old frame).
My current method of repair will be to re-epoxy in the insert with a long M3 screw to help with alignment. I’ll work the screw in/out several times and oil the screw/threads so the epoxy won’t adhere to it. After that, replace the M3 “set screw” with something like a pan head screw.
The other solution is to bore out the hole a little more and replace with M4 screws, then do what was done in the previous post (attach nuts/washers to fill in the gap, or even a sprint like is common with horizontal dropout adjustments).
Any insight appreciated.
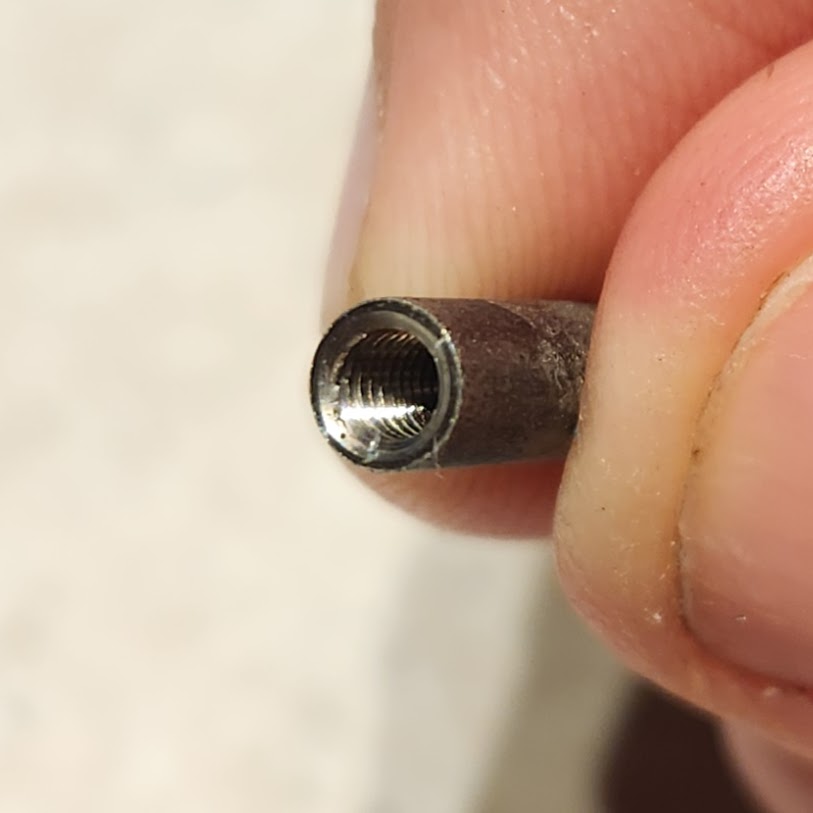
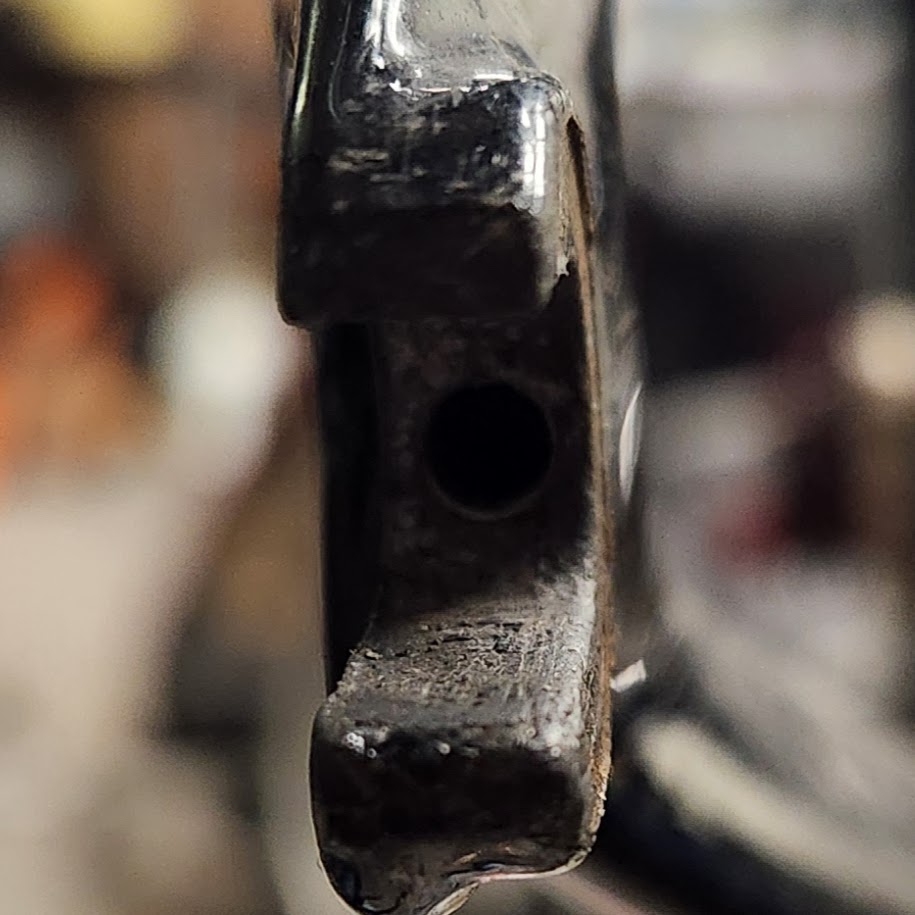
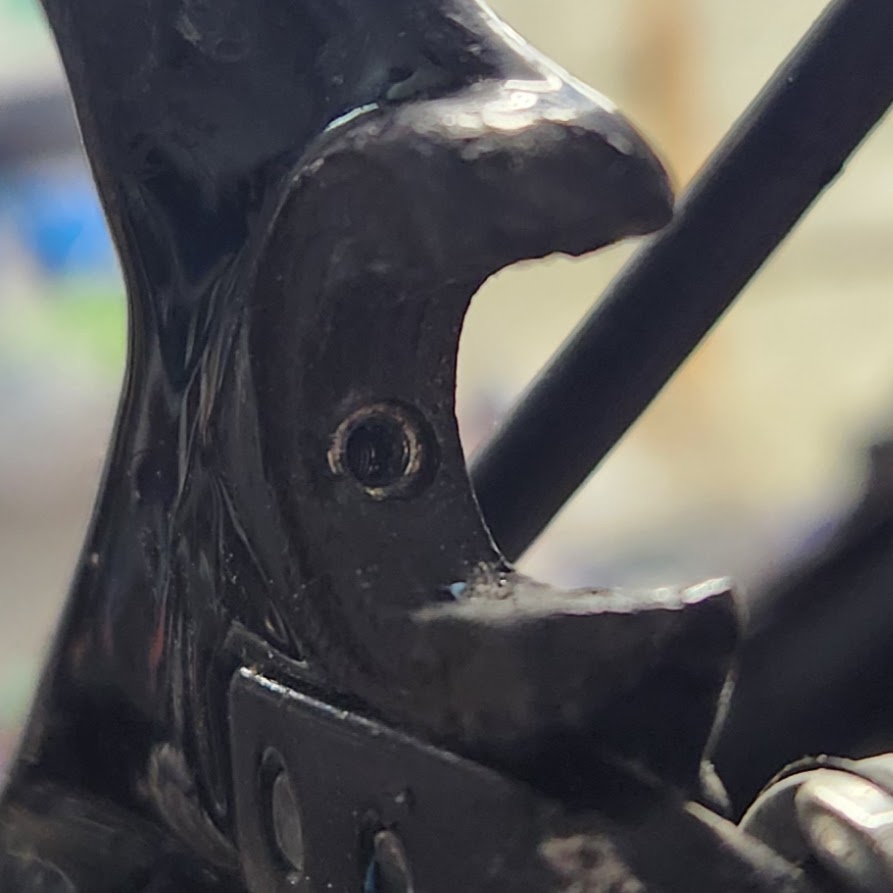
Pics show the bent set screw in the sleeve, the left dropout with the sleeve removed, and the right “healthy” dropout with the set screw removed.
My current method of repair will be to re-epoxy in the insert with a long M3 screw to help with alignment. I’ll work the screw in/out several times and oil the screw/threads so the epoxy won’t adhere to it. After that, replace the M3 “set screw” with something like a pan head screw.
***JB Weld ***is your friend!! I’d use wax on the screw prior to applying the epoxy (instead of oil) - less chance of it migrating and causing poor adhesion.
I would definitely try the epoxy, the clamping force of the skewer is what is “supposed†to hold the wheel in place so theoretically it just needs to be strong enough to overcome the friction of threading the set screw in/out. Cleaning and drying the hole in the frame would be key.
If all else fails this would be an ugly heavy solution as well, I used them for years on skewered single speed mtn bikes to help hold the wheel in place, even sadly had to grind the bottle opener tangs off one to fit a oddly shaped dropout
Oh dang. That tuggnutt tensioner looks like a great option (albeit ugly). The dropouts on the bike are also completely carbon, and there’s a lot of frame flex when I tighten the skewer, it makes me nervous that I’m putting too much tension on the chainstays/seatstays. I think the tuggnut might help remove some of the slack in the system.
Would I use them on both sides?
If it looks stupid but it works, then it’s not stupid.
If you google around for chain tensioners you may find something more visually appealing- I would try just the one side to start especially on a rim brake bike, it was really the braking force of early disc brake mtb bikes that had a tendency to pull wheels out of alignment installed into horizontal frame dropouts.
Good luck! I still think the epoxy is worth trying as well
Thanks. I’ll look around. My only issue with going the epoxy route immediately is that the threads on the sleeve may be a bit damaged. I don’t want to epoxy the piece back in, find the threads damaged, and then need to re-tap it or get the worlds smallest helicoil to repair it. A chain tensioner would fix one side and get me back riding almost immediately.
I would definitely try the epoxy, the clamping force of the skewer is what is “supposed†to hold the wheel in place so theoretically it just needs to be strong enough to overcome the friction of threading the set screw in/out. Cleaning and drying the hole in the frame would be key.
If all else fails this would be an ugly heavy solution as well, I used them for years on skewered single speed mtn bikes to help hold the wheel in place, even sadly had to grind the bottle opener tangs off one to fit a oddly shaped dropout
ran one on a 26inch wheeled chromoly frame, a GT if I remember correctly, a redline monocog, and a custom ti 29er all with rear facing horizontal dropouts and 135mm hubs and skewers. As mentioned I had to grind the ears of one to fit the ti bike
Edit to add: these help hold the wheel in correct alignment and do nothing to hold the wheel in the frame if the skewer came loose if that’s what you’re asking
Yeah, I was mostly referring to the extra slack. I realize I’ll still need a skewer but I’m hoping that the extra thickness of the tuggnut will help free up some of that “slack” so I’m not clamping my chainstays as much. It almost seems as though the axle width is just a little wider than it should be compared to other bikes that I own.
I’m also not a fan of the dropouts themselves being full carbon. I would prefer to have a metal insert. The quick release does that they do and embedded/ground down some of the dropout. This tuggnut will provide a better mating surface.
It might not work well on the drive side with the derailleur but for the non-drive side I think it will work very well.
This bike already has some quirky things compared to stock. I have some bottle-bosses on the top tube for storage, and an aluminum PRO front end with carbon Missile Evo stem. I could paint the tuggnut black and it’ll be a neat conversation piece.
Yeah I figured you had the gist of it I was more replying to the other poster.
One other hack I saw but never had much success myself with was to install a chainring bolt in the deepest part of dropout itself to hold the wheel back from sliding forward.
These where all metal frames as well so that’s another consideration to your repair as you’ve mentioned.
***JB Weld ***is your friend!! I’d use wax on the screw prior to applying the epoxy (instead of oil) - less chance of it migrating and causing poor adhesion.
Exactly this. JB Weld is really good for this sort of thing, and Wax is definitely superior to oiling the threads.
In addition, prep the surfaces of the insert and the frame with a scotchbrite pad (kitchen scrubby works fine) followed by a cleaning with (preferably denatured) alcohol.
I’ve done a bunch of repairs like this, they’re fairly simple and robust.
I’ve had similar tire rub issues on my 2004 Litespeed Ultimate. It was very short chain stays (39.3 iirc) and a cutout on the seat tube. 23 Conti 4000s were fine. 25s were not. This was on an early set of Reynolds Assualts (15mm internal?). I eventually replaced the wheels with Hunts with a 19mm internal width. The new wheels, along with the lower tire pressures we now use, allow me to use 25mm tires.
***JB Weld ***is your friend!! I’d use wax on the screw prior to applying the epoxy (instead of oil) - less chance of it migrating and causing poor adhesion.
Exactly this. JB Weld is really good for this sort of thing, and Wax is definitely superior to oiling the threads.
In addition, prep the surfaces of the insert and the frame with a scotchbrite pad (kitchen scrubby works fine) followed by a cleaning with (preferably denatured) alcohol.
I’ve done a bunch of repairs like this, they’re fairly simple and robust.
Thanks. I’ll probably give it a go this weekend.
I guess, if I do mess it up, the worst that could happen is that I will need to drill out the threaded insert and find a new one to epoxy into it, putting me back to where I am right now.
I had to epoxy on the front derailleur hanger after it broke off (in hindsight, some rivnuts to replace the rivets would have been smarter) so I’m ok with simple epoxy jobs.
I really like how it will take some slack out of the axle spacing as well as have more surface area to support the axle. Time to call around for some solutions. Other, cheaper, chain tensioners may work with a 3/8 to quick release (8mm to 5mm?) adapter like the one that comes with the tuggnut
Yeah the advantage to a tensioner like the tugnutt or something similar is the adjustment- it mimics exactly what your stripped set screw was functioning for just externally on the dropout from the rear instead of internally in the dropout from the front.
I haven’t seen the monkey nuts before but those appear to be in the same vein as the chainring bolt hack I mentioned earlier- more of a fixed spacer installed in the deepest part of the dropout to space the skewer/axle further towards the rear of the dropout in a fixed position, but not adjustable.
If you have a lbs in your area that has a commuter or fixed gear/ track/courier vibe you could stop in and see if they have them in stock to see it up close. The tuggnuts are a heavy chrome plated part- quite robust and had a wide range of adjustability.
Any bike shop can order surly (qbp) parts but if you find a stocking frame dealer they will be familiar with the parts, every surly made for quite a while came with horizontal dropouts- it was a big marketing deal for them due to their image as more utility focused transportation bicycles.
You do know that you don’t actually need any of this stuff, right? All the screws are intended to do with this type of a dropout is provide an indexing point for wheel insertion. The wheel is held in place entirely by the clamping force of the quick release. If you have had problems with your wheel moving under load you don’t need chain tugs, you need a better QR.
You do know that you don’t actually need any of this stuff, right? All the screws are intended to do with this type of a dropout is provide an indexing point for wheel insertion. The wheel is held in place entirely by the clamping force of the quick release. If you have had problems with your wheel moving under load you don’t need chain tugs, you need a better QR.
I know this to be correct, but I still don’t trust it. Kind of like how I check to make sure I don’t have my phone in my pocket before a swim session, even though I’m wearing pocket less jammers.
There is hardly any clearance when I run 25 tires in it, so it takes a little bit of time and attention to get the wheel in the perfect spot. I could switch to a narrower tire, even just for the rear, but I like my tires. Having repaired adjustment screws will help with centering everything.
It sheared off on my Cervelo P3 and I could not remove the remaining part of the drop out screw from the frame. A friend of mine has 3D printers so he made a spacer for me and it works great to keep my tire away from the frame.
It sheared off on my Cervelo P3 and I could not remove the remaining part of the drop out screw from the frame. A friend of mine has 3D printers so he made a spacer for me and it works great to keep my tire away from the frame.
I was thinking this route as well. I think I just need to scrap the idea that I can comfortable run 25c tires and go back to 23 or even 21 so alignment isn’t as big of a factor.
I was thinking this route as well. I think I just need to scrap the idea that I can comfortable run 25c tires and go back to 23 or even 21 so alignment isn’t as big of a factor.
Bikes of this generation really aren’t designed to have anything bigger than a (small!) 23 in there, so this is a good idea.
You don’t need to have anything 3D printed, just superglue a piece of wood in there and color it black with a sharpie. Faster, cheaper, and literally indistinguishable result.