Just mount your steed like one of the knights of Ni! /pink.
So just to add to the conversation and with the caveat that today is the very first day of my research.
I’ve noticed there’s a huge difference in the dampening capabilities of the dampener. From say 10lbs to hundreds of lbs. I’ve seen several builds with dampeners from different sources so I’m hoping to understand more how much force different people’s completed builds dampen. I know there’s more than one measurement. I think one is static and one is shear force.
Anyways I understand that’s not your issue but this may help anybody as uninitiated as me.
I’ve seen the differences in load capacity and deflection too. When I saw the dampeners in person, some of that made sense as the <100lb capacity dampeners were very small (like an inch high).
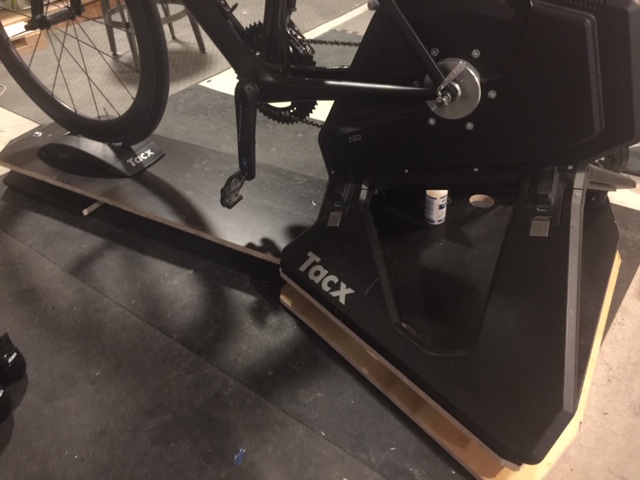
The one that I bought has a relatively huge load capacity (2200lbs) and what I thought was lower deflection. (link here). I thought it would be too stiff, but I don’t think that’s the case since the board easily deflects laterally, so much so that I need some kind of cushion out on either side to keep the unit centred (not tipping over) while riding (I’ve just used tennis balls as my cushion).
The height difference is more like 3 inches rather than 6 (2x12mm plywood sheets+2 inches of spacing between the boards) but you do need to consider your weight is also a big factor in rocker plate design.
The less a rider weighs the lower the design tolerances are for a rocker. In effect the more mass you are throwing around on the bike the less details like the floor being level, the trainer being counter balanced and/or the location of the inflatable balls being spot on matters. As rider mass decreases the forces created by your movements on the bike decrease as total fraction of the system and your room for error drops significantly.
If you are vertically challenged I am going to guess you are on the lower end of the mass spectrum and that means you need to take extra care with rocker plates.
Tsunami,
For my home-made rocker, I purchased two of these multi-purpose folding mats: I use one under the front wheel riser block and another one as a step-stool. Folding the mat in half works great and is the ideal height.
@Kid
I recently built one and it has made my rides more comfortable for sure. I went with the minimalist approach.
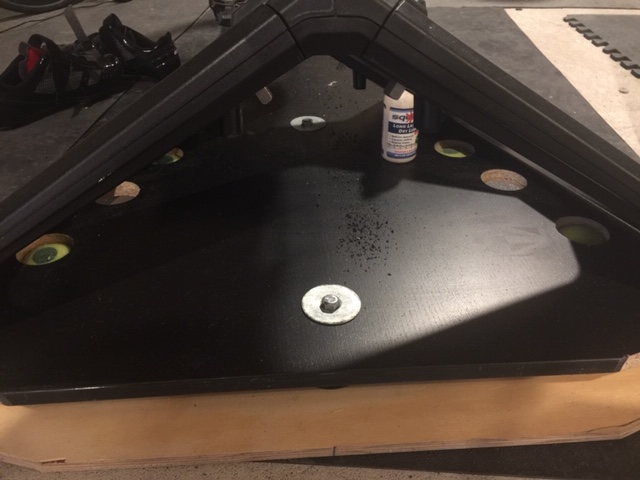
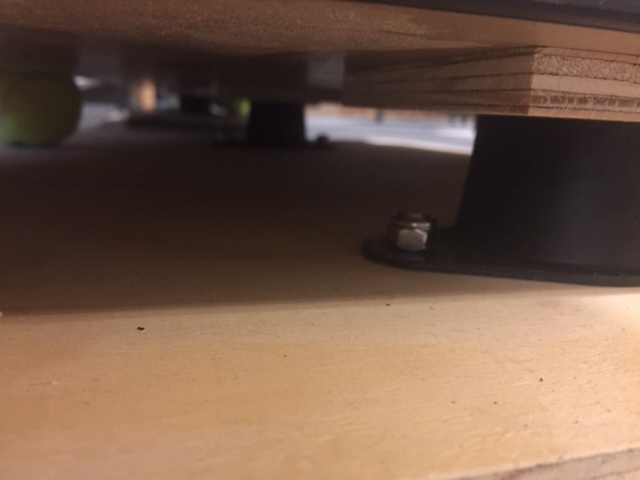
I used 4 vibration mounts and two racquetballs. I like the racquetballs the best as they “give” more than other balls I tried. Plus, they are small enough that they work without cutting holes in the wood (one less thing to do).
https://www.amazon.com/gp/product/B00DNF8ZGK/ref=ppx_yo_dt_b_asin_title_o00__o00_s00?ie=UTF8&psc=1
Hi folks, thanks for all the responses. The Wahoo Snap holds my bike with 700 cc wheels, 1.5 inches off the ground. The SBR Rockr I purchased is 3.5 inches tall, for a total stack of 5" which indeed would be significant if I had to clear the saddle from the floor. The bike, on an unstable platform and the trainer was initially held on with velcro straps, is in a tight spot in a bedroom so yes, I do straddle it on the platform vs stepping on the pedal for extra height. Goal is to not gauge the wall with my cleat. Now that I have the Snap secured with eye hooks screwed into the platform and hose clamps around the base bars and through the eye hooks, I could probably do the pedal step and over thing.
While I can’t exclude that the vibration dampeners are worse than the pillow bearing approach, I get a lot of side to side movement/flex with the dampeners (so I don’t think it’s the difference between pillow bearings vs. dampeners).
Even with the dampeners, I still have to use some kind ball/cushion on the side to help stabilize the rocker. I’ve been using tennis balls (three per side), and I suppose I could mess around with how many I use to see if I can’t get a better ‘feel’ with fewer balls on either side
I’ve been wanting to build a DIY rocker plate, and leaning toward the vibration dampeners route. Now that you’ve had some time on yours how do you like it?
What I like about the dampeners idea versus pillow bearings is the possibility of having a slight amount of fore/aft motion and (maybe?) a bit of up and down dampening – do you notice any fore/aft and up/down give to your rocker?
Part of why I ask is because I noticed SRB is now making a simpler and less expensive Rocker Pod Lite ($150) that doesn’t use dampeners or pillow block bearings. Seems like a simple, solid option but I imagine having some additional motion and dampening would make indoor riding all that much better.
I have been using the rocker for about a month now and I think there is some benefit to using it. I don’t get numb nuts quite as quickly and I like the side to side sway of the bike. Occasionally, I will take short breaks on the trainer after about an hour or so, but I don’t need the breaks as much as I used to.
I live close to an Ikea and I picked up a scrap piece of desk-top (literally, the top of an ikea desk) for $20 and I created a full length rocker. I now use 4 dampeners ($40) and 4 green dot tennis balls ($10), Ikea top ($20), plywood base ($25), and hardware (nuts, bolts, washers, feet, $30). So, I’ve spent $125 on the Rocker. I wouldn’t say I’ve saved all that much over buying it from SBR.
I might switch up to inflatable cushions as it could make it easier to correct for slight out of level issues when I’m on the bike (the trainer isn’t perfectly balanced L/R).
As for forward and back movement. I noticed MORE back and forward movement with only two dampeners at the rear, and I didn’t like it! The motion was too jerky and not a smooth swaying motion. While I do feel some movement forward/back with 4 dampeners, it is less jerky than before (I like it better). YMMV.
I have seen some (on the facebook rocker plate forum) use pillow bearings, rods, and springs to create for fore/aft movement. I imagine that’s the route you’d want to go
bottom image is inverted 180Ëš(?)
noticed SRB is now making a simpler and less expensive Rocker Pod Lite ($150) that doesn’t use dampeners or pillow block bearings. Seems like a simple, solid option but I imagine having some additional motion and dampening would make indoor riding all that much better.
That certainly seems to be a much more economic option, $150 vs $375-500.
Has anyone tried the Rocker Pad Lite? The price difference is huge. Do you get what you pay for or are they just overpriced?
I’m not about to build my own. I would like to see the pros and cons of the cheaper model.
I’ve been looking for this template - do you still have it and/or can you post its location?
I built the Chad McNeese Rockit Launcher. Got the plans off the web in PDF format. It cost about £50 to make and has made indoor training as painless! as it can be! It is adjustable for the amount of movement and with a Workshop Floor tile on the top plate there is no need to clamp a Wahoo Kickr down. It remains rock solid when out the saddle.
Great to hear!!! So glad my design helped and sounds like it is working just as intended.
Thanks for the feedback and happy rocking ![]()
How stiff can skateboard trucks be setup? I could easily fab a little bracket to bolt a pair of trucks between the leg tube and mount point of my trainer so that it rocks.
I hear you can setup skateboard trucks stiff or loose. Like, how stiff? Enough that this could work?!
I feel $20 for a pair of basic trucks could be worth trying this out.
I use a 5 gallon bucket turned upside down as a step stool for getting on/off. Takes a little bit of practice, but works great.
I use the little step-stools they make for toddlers to get in the bathtub. Nonslip and very stable. Had one left over after my son didn’t need it anymore. Worked so well, went out and bought more.
Link to stool like this on Amazon.
We have had people use the skateboard trucks. You can crank down the compression nut for more stiffness. But even with that, you are likely to need some actual leveling springs. Ideally, I would recommend a loose truck setting, which allows more fine tune control via the leveling springs. Some of the truck users kept the wheels on and use that as the foundation for surge motion (fore-aft, like the Saris MP1 and Inside Ride E-Flex). Lots of ideas in the Facebook Rocker Plate group to review for inspiration.
We have had people use the skateboard trucks. You can crank down the compression nut for more stiffness. But even with that, you are likely to need some actual leveling springs. Ideally, I would recommend a loose truck setting, which allows more fine tune control via the leveling springs. Some of the truck users kept the wheels on and use that as the foundation for surge motion (fore-aft, like the Saris MP1 and Inside Ride E-Flex). Lots of ideas in the Facebook Rocker Plate group to review for inspiration.
Thanks for the link to the group.
Good considerations.
Found the FB useful.
Here’s the new setup. $15 for the heavy duty furniture rocker springs, $10 for the industrial lazy susan, scrap wood, the feet from my old Cycleops Fluid 2, some scrap metal tubing I had.
I basically reverse engineered a redneck Kurt rock’n’roll setup replacing the Kickr Core legs. So no modification to the trainer at all.
It’s awesome. I put limits in place on the rock motion. You’d think it would bump over left/right on those springs, but it’s smooth. It actually takes some balance to get on it and you have to ride it like a bike on the road. If I upgrade the “lean limiters” I could lean when descending like real life and steer/use the Beta testing Zwift steering.
The lazy susan and rocking motion really took a ton of strain off of the bike versus being permanently fixed.

I have been able to practically double the amount of time on the trainer since using a rocker plate.
Just released a free webinar on DIY Indoor training hacks covers a bit more than just rocker plates. Includes lots of the little things we forget when trying to set up comfortable and convieinet trainer rooms.
Coach Rob
I “built” one. I do this. Foam pad under the back of the trainer and also the front wheel. The movement adds a bit to comfort.