Maybe I should have started this thread when I first started building my own frame, but I thought it was so much fun to build the thing than writing about it and therefor the writing comes now.
I wanted to build a CF frame since I just wanted to see if it was possible for me to do it. You should know that I had never even touched a CF frame, nor seen a TT frame up close.
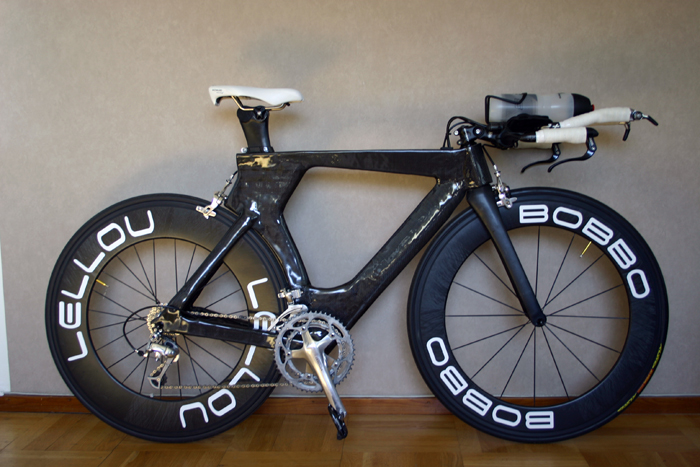
When I started to build, Cervelo's P5 was announced and I thought it was so beautiful that I tried to copy it as much as I could (there were not that many pictures nor measurements at that time).
I thought that painting the frame when it was finished would be too hard so I just let the nude CF appear.
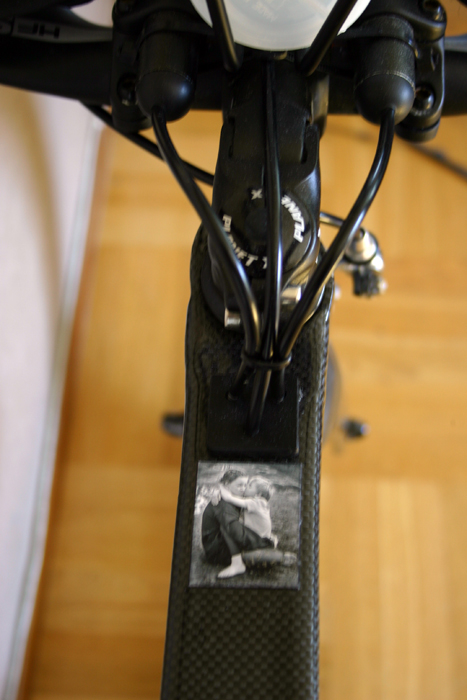
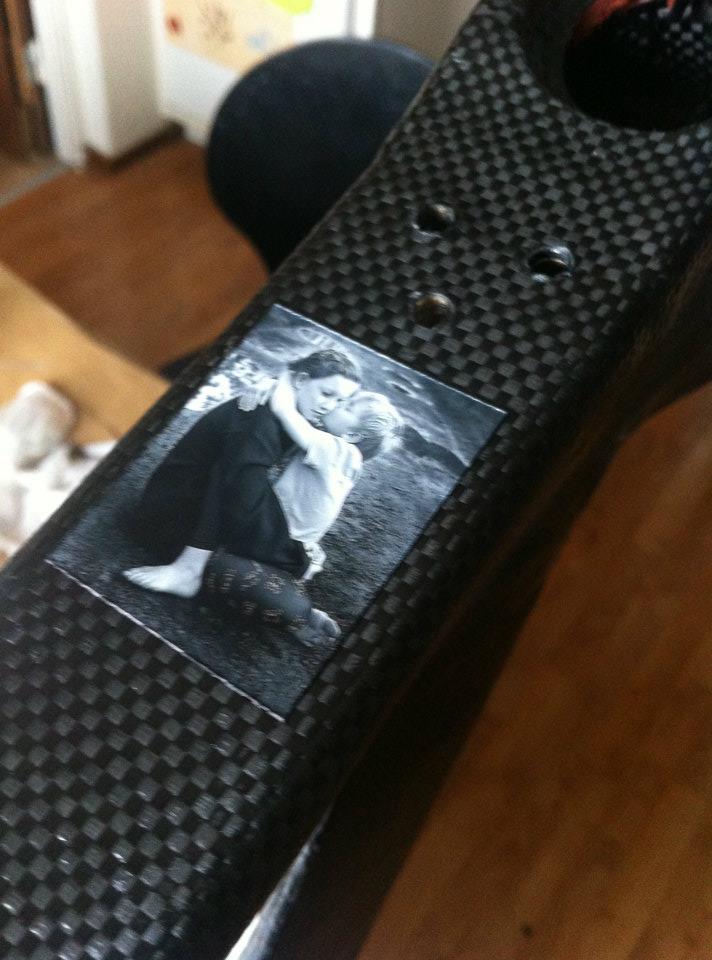
I also love my children so much (don't all parents do) so I dedicated the frame by putting an image on the top tube with them (under the clear coat) and the words 'Lellou' and 'Bobbo' is their nicknames.
First I cut out each tube in extruded polystyrene (that you use when building houses). I then wrap the tube with CF (wetted with resin). I then placed the thing in a vacuum-bag and applied vacuum and let it cure over night. When I had done all tubes, I simply? attached them to each other and when that was done, painted the whole thing with some resin and sanded it off to make it smooth. I then finished with clear coat.
The cost for the material (six square-meters of CF) and resin was around $300. I had to buy some extra equipment (like vacuum-pump, plastic bags etc) and that costed as much as the frame.
Anyway, here comes the pictures with some descriptive texts beneath.
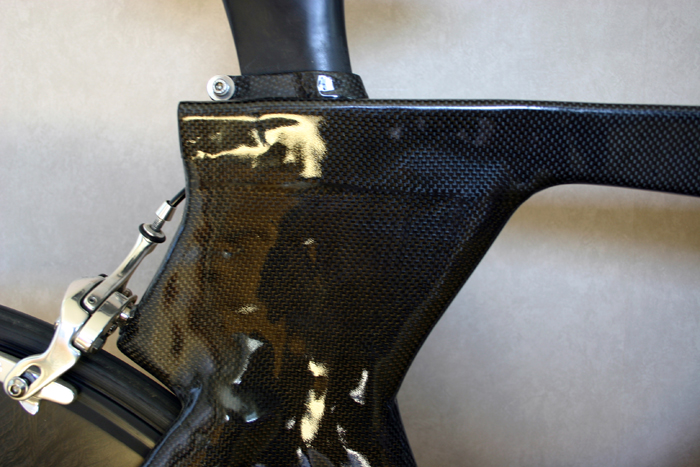
Head tube: The first thing I made. It has a total of six layers of CF and the little notch is for the front wheel.
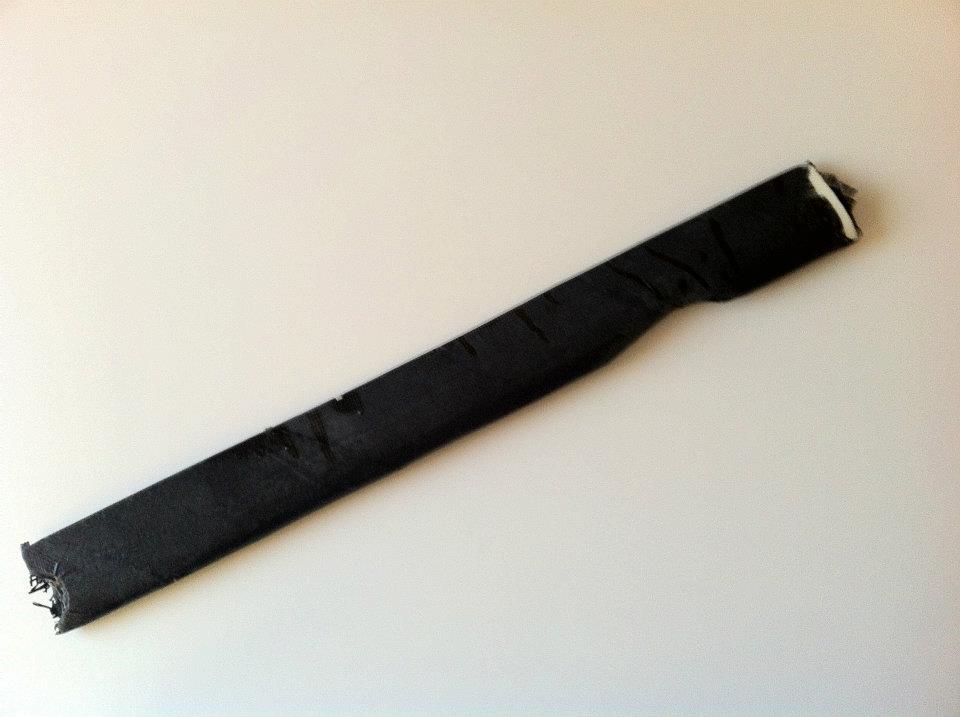
Top tube. Not much to say about.
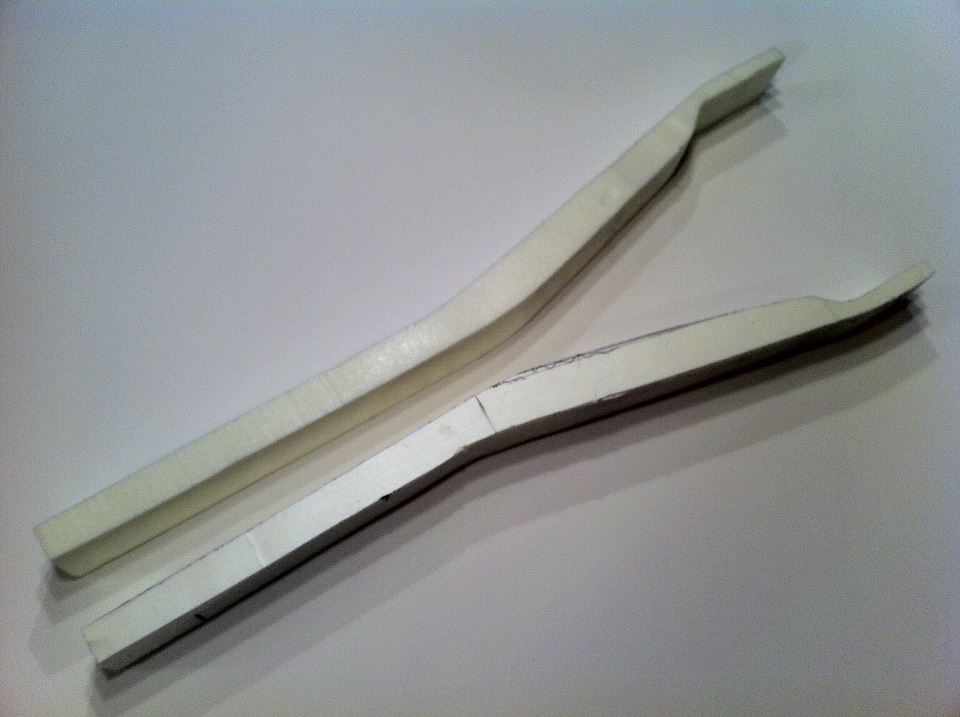
Seat tube. Here you can see the polystyrene.
Seat tube: A close-up where the seat goes in. I put some more CF around the whole thing and it is really steady. The hard part with this was that I had to put it dead-straight (don't want the seat to be off)
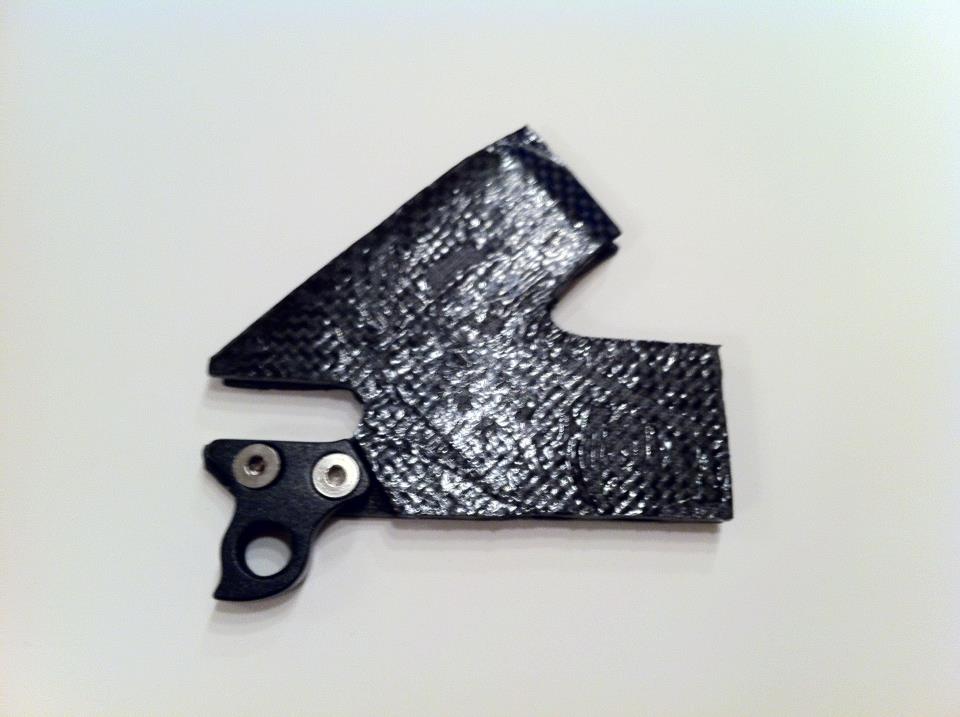
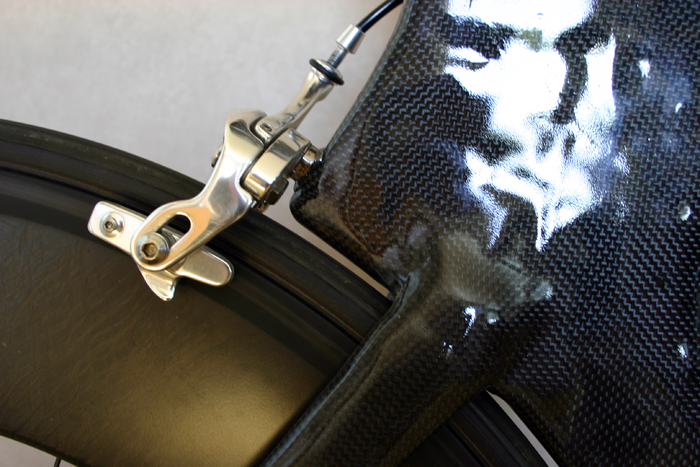
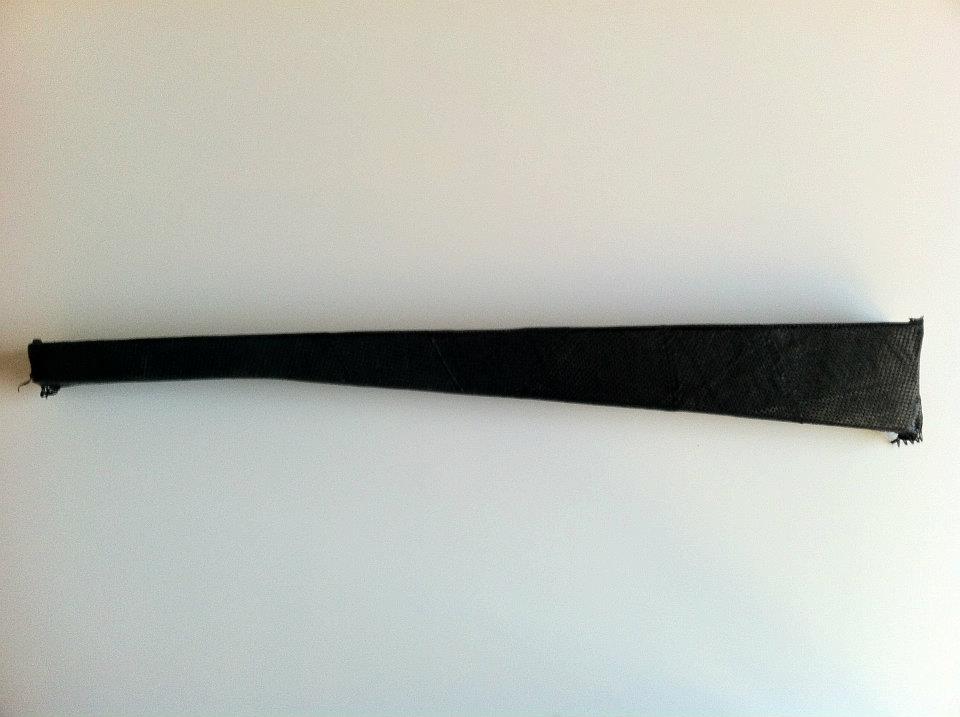
Dropout. The thickness of this piece is 8mm and was build by adding 40 layers of CF. It was really tough to saw through and the piece ate a couple of saw-blades :)
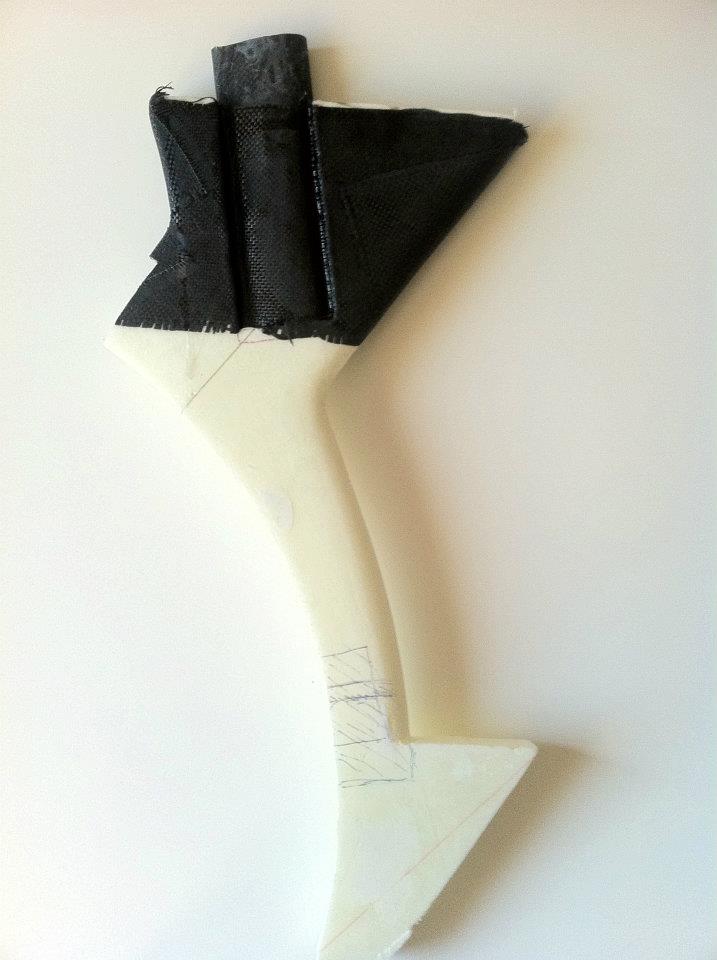
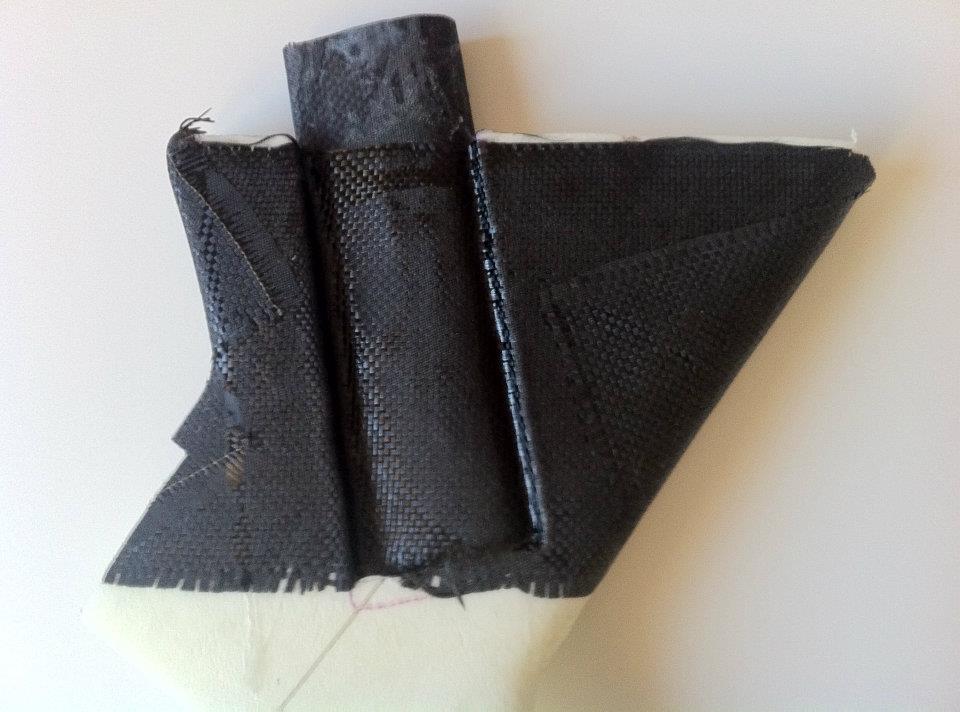
Chainstay. Here you can see how the polystyrene looks before adding the CF. Layer on I put some acetone in the tubes and that will melt the polystyrene. I think that I only saved 100-200 frames, but the feeling is better :)

Top tube. I have sawed the whole where the top from the seat-tube will be put through (so the saddle post can slip in it).
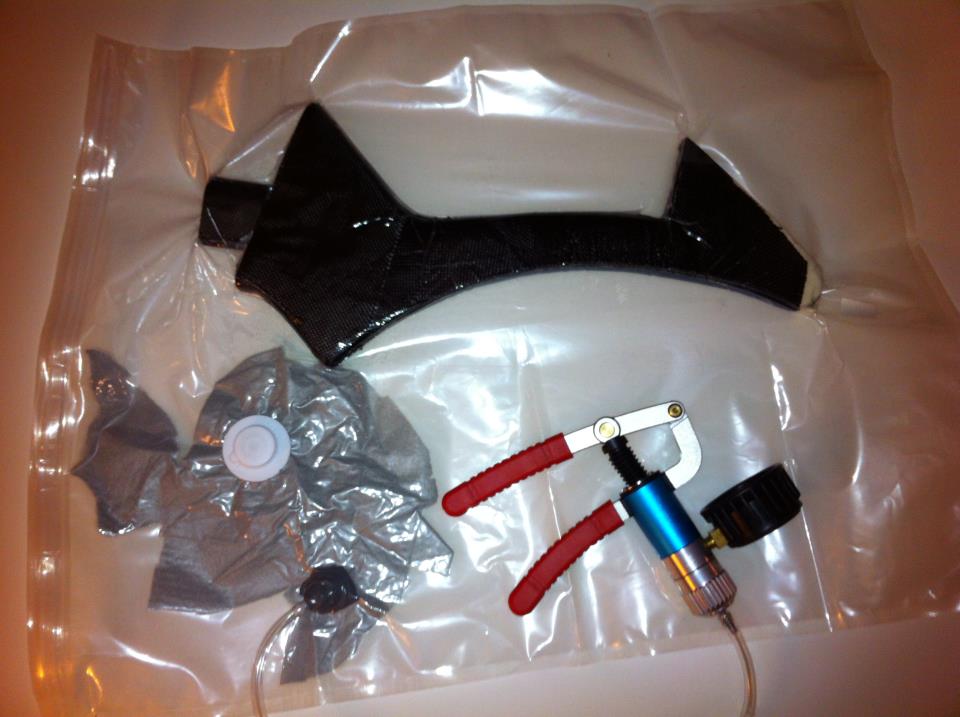
Here you can see how I use the vacuum-bag
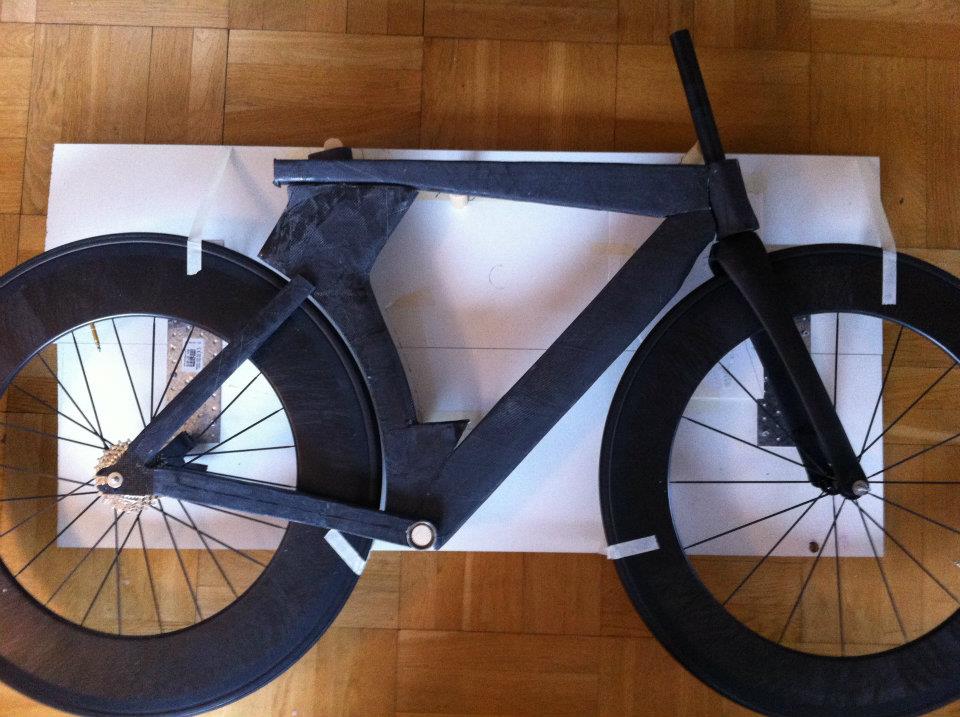
Simple align-text. Everything looks nice so far.
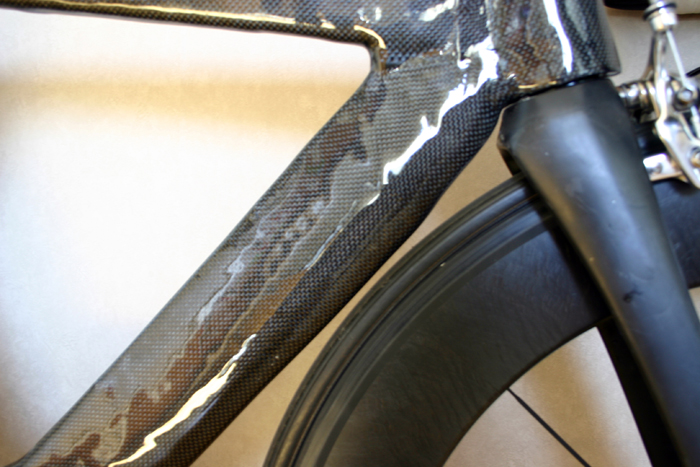
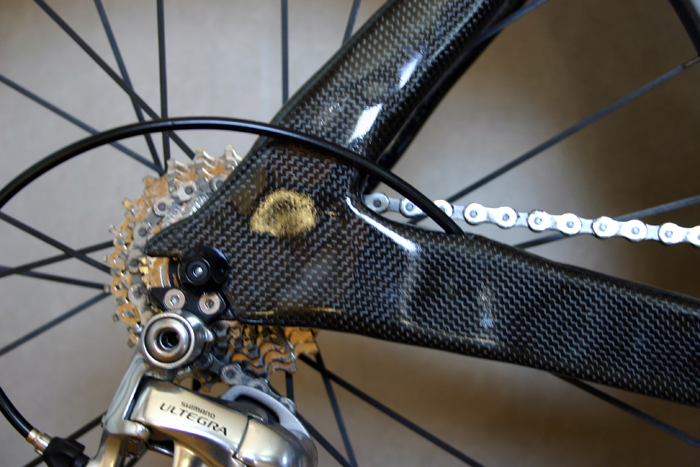
After this image I started to wrap more CF around the joints and make it smoother.
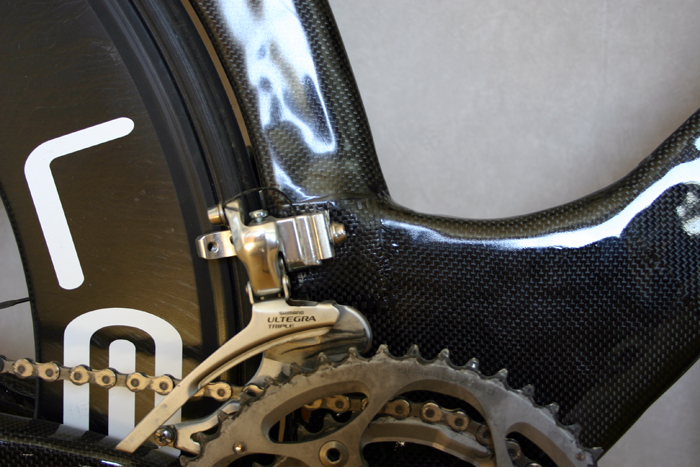
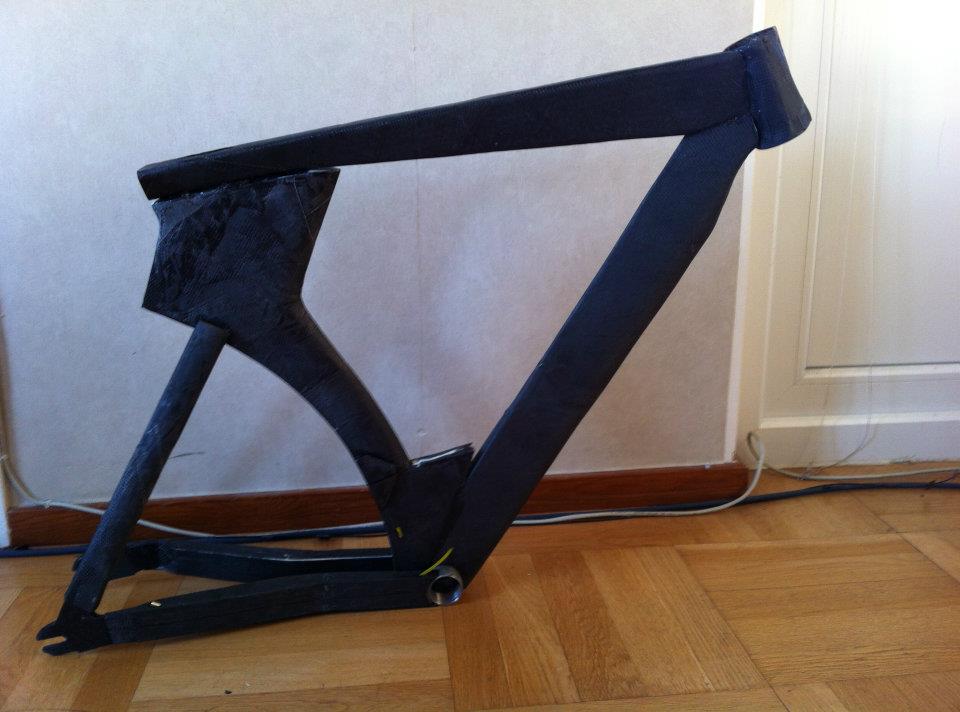
The most beautiful part of the bike :)
That was all images that I took during the building.
I wanted to build a CF frame since I just wanted to see if it was possible for me to do it. You should know that I had never even touched a CF frame, nor seen a TT frame up close.
When I started to build, Cervelo's P5 was announced and I thought it was so beautiful that I tried to copy it as much as I could (there were not that many pictures nor measurements at that time).
I thought that painting the frame when it was finished would be too hard so I just let the nude CF appear.
I also love my children so much (don't all parents do) so I dedicated the frame by putting an image on the top tube with them (under the clear coat) and the words 'Lellou' and 'Bobbo' is their nicknames.
First I cut out each tube in extruded polystyrene (that you use when building houses). I then wrap the tube with CF (wetted with resin). I then placed the thing in a vacuum-bag and applied vacuum and let it cure over night. When I had done all tubes, I simply? attached them to each other and when that was done, painted the whole thing with some resin and sanded it off to make it smooth. I then finished with clear coat.
The cost for the material (six square-meters of CF) and resin was around $300. I had to buy some extra equipment (like vacuum-pump, plastic bags etc) and that costed as much as the frame.
Anyway, here comes the pictures with some descriptive texts beneath.
Head tube: The first thing I made. It has a total of six layers of CF and the little notch is for the front wheel.
Top tube. Not much to say about.
Seat tube. Here you can see the polystyrene.
Seat tube: A close-up where the seat goes in. I put some more CF around the whole thing and it is really steady. The hard part with this was that I had to put it dead-straight (don't want the seat to be off)
Dropout. The thickness of this piece is 8mm and was build by adding 40 layers of CF. It was really tough to saw through and the piece ate a couple of saw-blades :)
Chainstay. Here you can see how the polystyrene looks before adding the CF. Layer on I put some acetone in the tubes and that will melt the polystyrene. I think that I only saved 100-200 frames, but the feeling is better :)
Top tube. I have sawed the whole where the top from the seat-tube will be put through (so the saddle post can slip in it).
Here you can see how I use the vacuum-bag
Simple align-text. Everything looks nice so far.
After this image I started to wrap more CF around the joints and make it smoother.
The most beautiful part of the bike :)
That was all images that I took during the building.